As you know, Helix Ultimate is an advanced template framework for Joomla that allows users to build Joomla templates easily. In the previous article we have instructed to install Helix Ultimate, in today’s article we will guide you to perform some basic settings after installation.
Logo
Logo can be an image or text, you can easily set / upload it for your Joomla website and adjust its height. When the system in Helix Ultimate is integrated, it allows you to add SVG logos to your website. Now you can build a fast loading Joomla website a lot easier.
Header
It allows you to choose the header height and decide whether the header will be sticky or not.
Body
In this section, you can turn the the website preloader on or off and switch between boxed and wide site layouts.
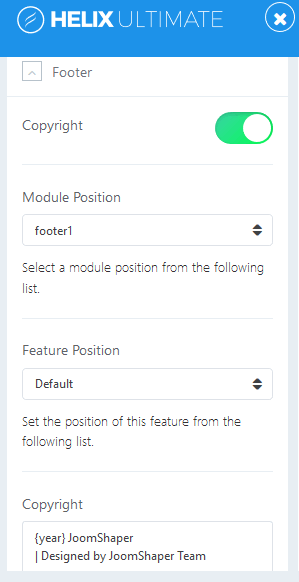
Footer
When you turn on this option, on your website footer, it will show a copyright notice. You can select the appropriate module position for it.
You can choose the ordering using the Feature Position menu to show some features along with the copyright notice module.
Go to Top
If you turn on the Go to Top feature (button on the bottom-right area), it will allow your site visitors to scroll back to the top of the page with one click of the button. This feature give your webiste better navigation and your website layout will look more professional.
Social Icons
Turn on this option and customize links if you want to display social media profile links on your Joomla website.
Contact Info
When this feature is enabled, you will get the information fields and module positions selection menu. Your website visitors will see your contact information on your Joomla website.
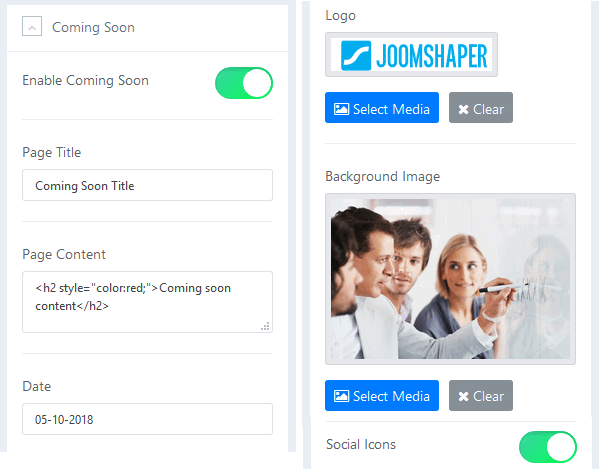
Coming Soon
Enable the “Coming Soon” option if you want to display customized maintenance mode page when your site is under construction.
You can set up the expected time and date to be back is also possible. Or add page title, page contents, date, logo, background image and social icons on your coming soon page.
Create a custom page for several errors like 404 and so on. Just upload a custom background image and a logo that you want them to display on the error page(s).
If you have any question about this tutorial, don’t hesitate to leave a comment below. And don’t forget to share with your friends if you find it useful! Thanks! 😀
We're Content Marketing team from AgeThemes with 10+ years in open source and tech. Our mission is to deliver high-quality content tailored for users of open source CMS platforms, including Joomla and WordPress. We strive to empower our audience with valuable insights and resources to enhance their digital experiences.