As you know, Helix Ultimate allows you to build mega menus on your Joomla website easily and quickly. It offers you different layouts so you can give diverse looks to your menus. Here are detailed instructions on setting up the mega menu builder in Helix Ultimate that you should not ignore!
What is a mega menu and why does your site need it?
What is a mega menu?
A mega menu is a type of navigation menu that typically appears as a dropdown with multiple columns and additional content such as images, icons, and rich media. It’s a more sophisticated and visually enhanced version of a traditional dropdown menu. Mega menus are designed to handle large amounts of information and provide users with a structured and organized way to navigate through a website.
Why do you need it?
Large Content Structure: If your website has a significant amount of content and numerous categories, a mega menu can help organize and present this content in a more user-friendly manner. It allows for multi-column layouts and helps prevent overwhelming users with too many options in a single dropdown.
Visual Appeal: Mega menus often include images, icons, and other visual elements, making navigation more visually engaging. This can help highlight important sections, products, or services, and create a more attractive and modern design.
Improved User Experience: Mega menus provide a more intuitive and efficient way for users to find what they’re looking for. With the ability to display subcategories and related content directly within the dropdown, users can quickly navigate to their desired destination without having to visit multiple pages.
Promotional Content: Mega menus can be used to showcase featured or promotional content, such as new products, special offers, or important announcements. This can be particularly useful for e-commerce websites looking to highlight specific products or categories.
Steps to set up the mega menu builder in Helix Ultimate
Open your Cpanel or localhost > Install Helix Ultimate.
Visit System > Site Template Styles > shaper_helixultimate – Default > Template Options.
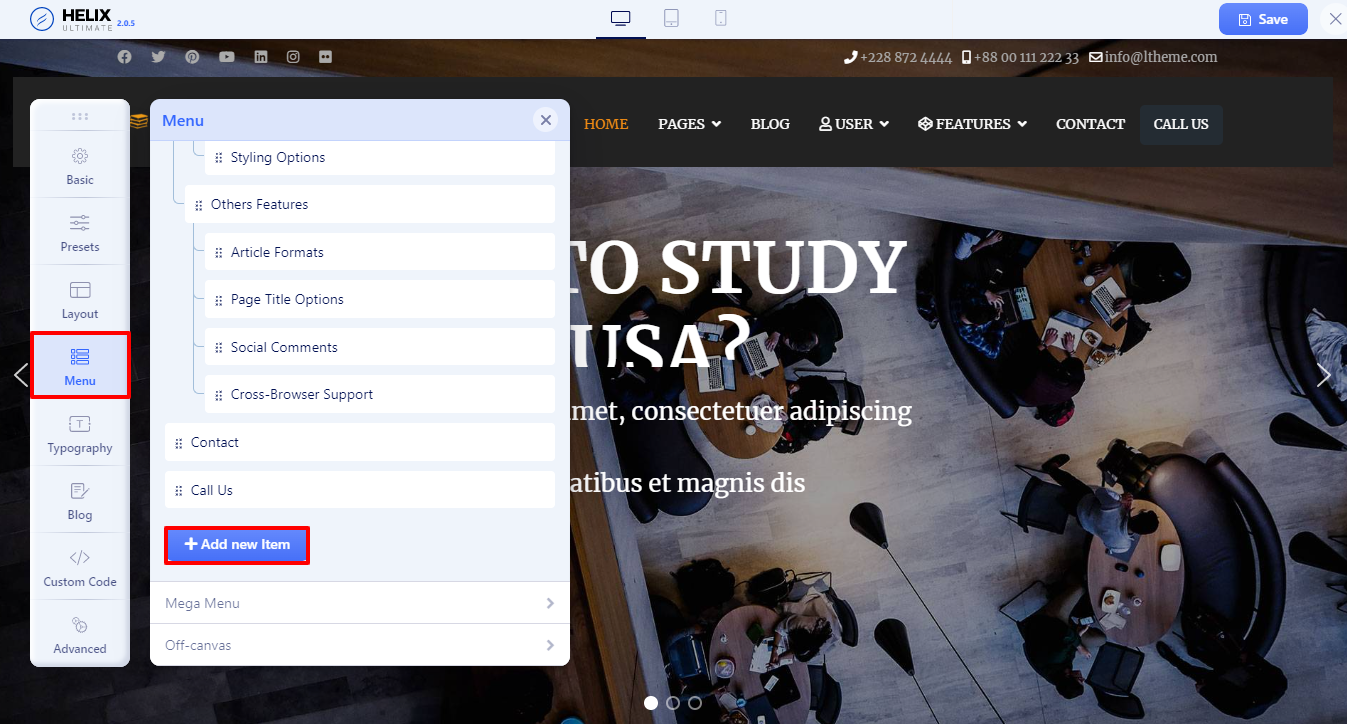
Go to Menu box > Scroll down > Add a new item to add a new menu item.
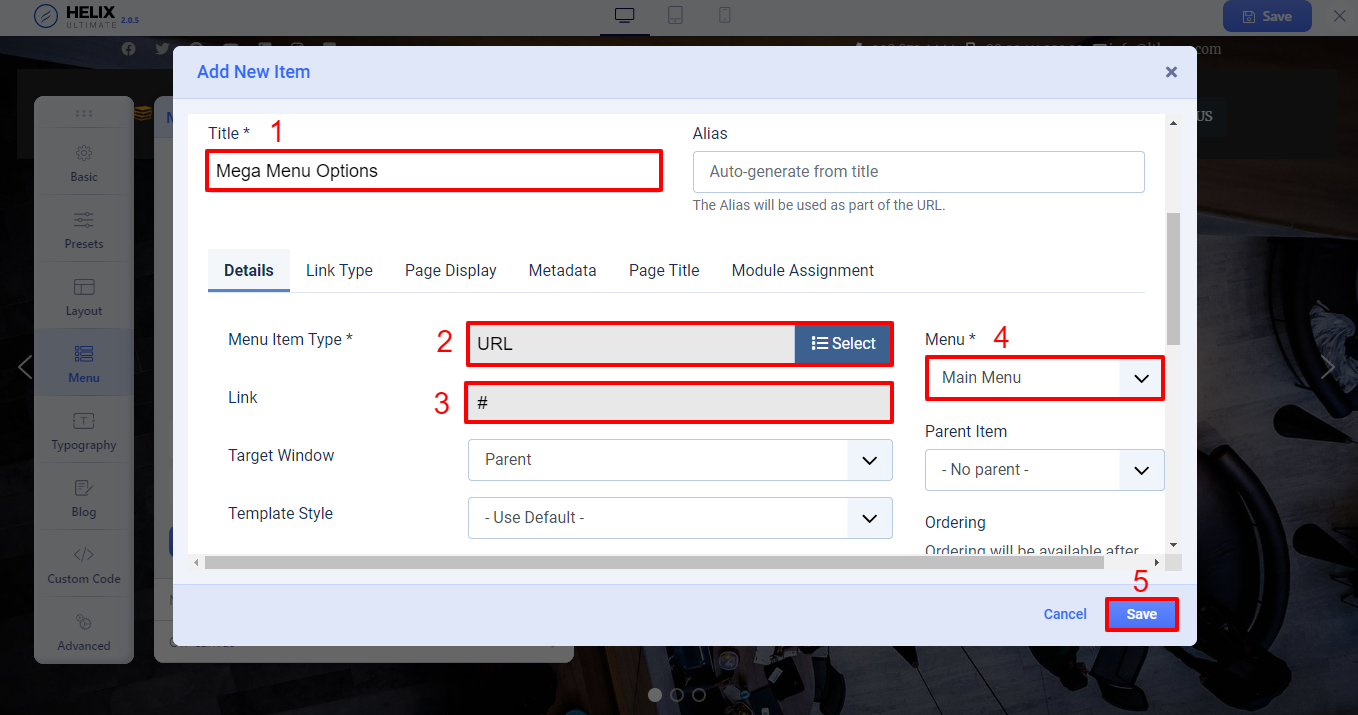
Fill out the information about title, menu, item type, link and the menu type when the Add New Item popup appears > Save.
Create the new submenus you want with the same steps above to assign the submenus to the parent menu.
Drag and drop the submenus you created above on the parent menu.
Repeat the process to add more menu items.
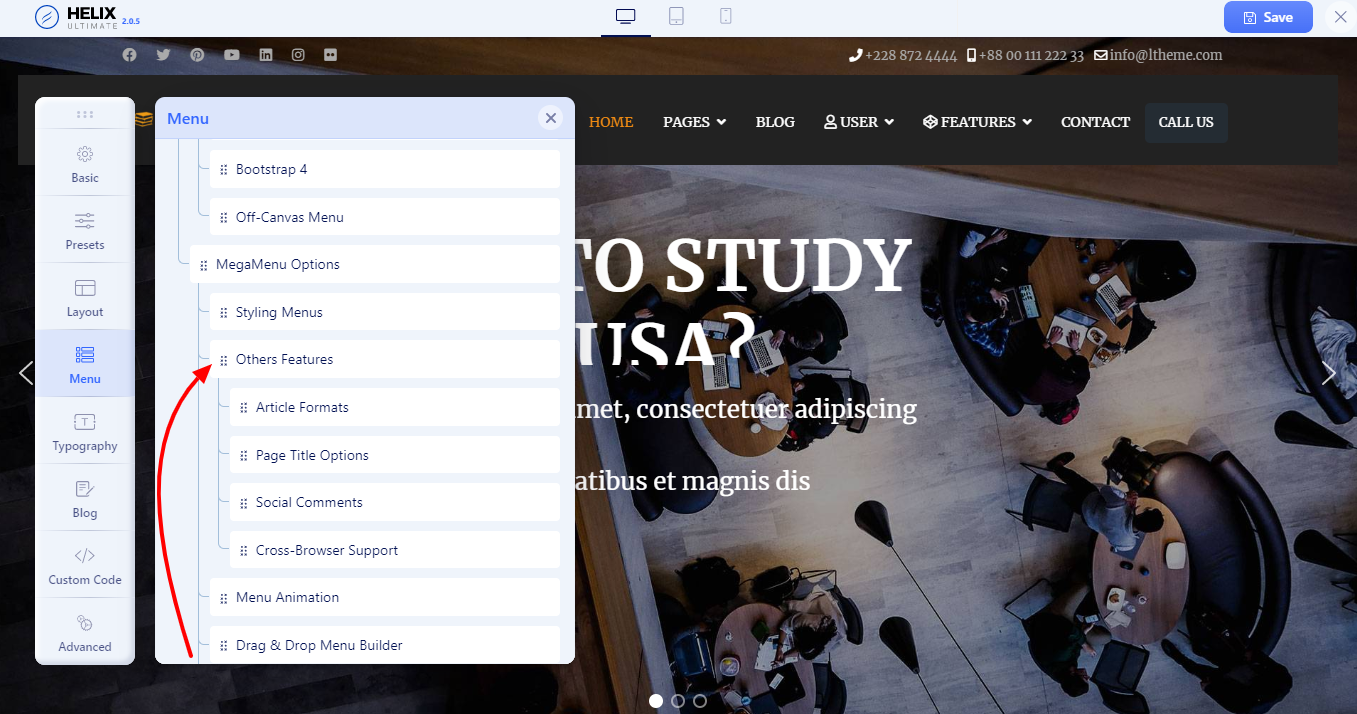
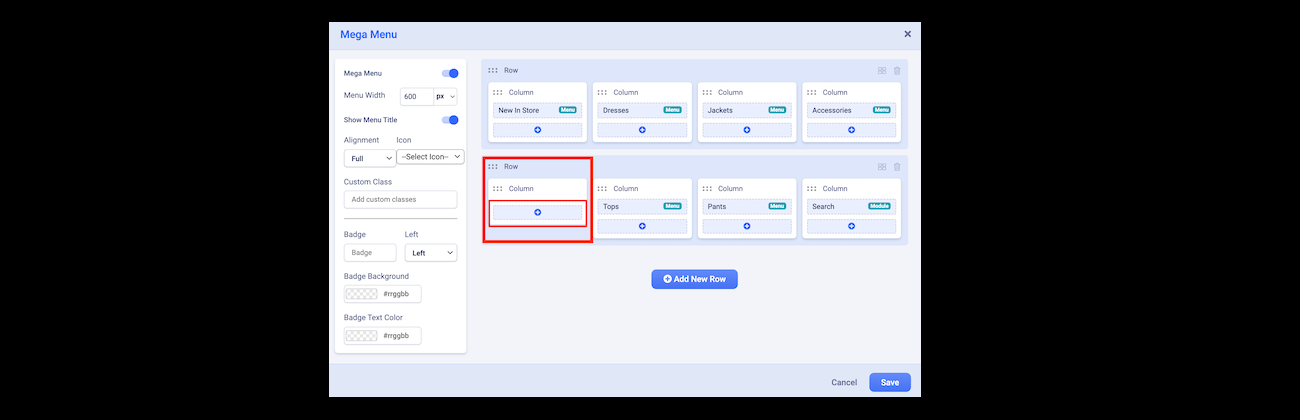
Go to Menu > Scroll down to the mega menu you have created > Choose the layout icon and customize it.
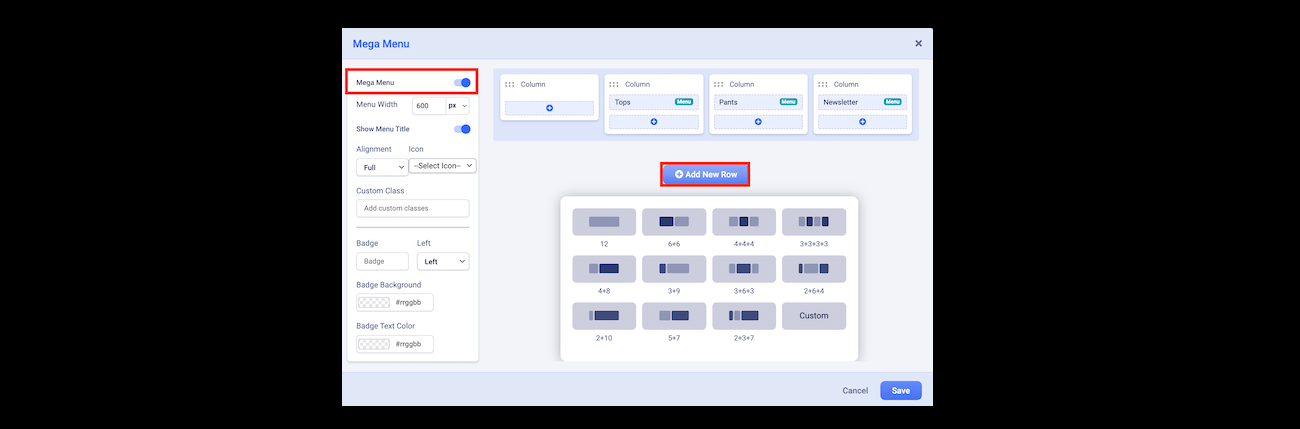
Press on the Enable the Mega Menu option > Add rows for your submenus > Save.
Create and add custom modules for your mega menu. It’s time for you to present the login module, a banner, an image, or a search bar on the mega menu.
Now, we will show you how to add and display an image on the mega menu.
Firstly, let’s open Components > SP Easy Image Gallery > Albums.
Secondly, click on the + New button > Fill out the title, add an image > Save.
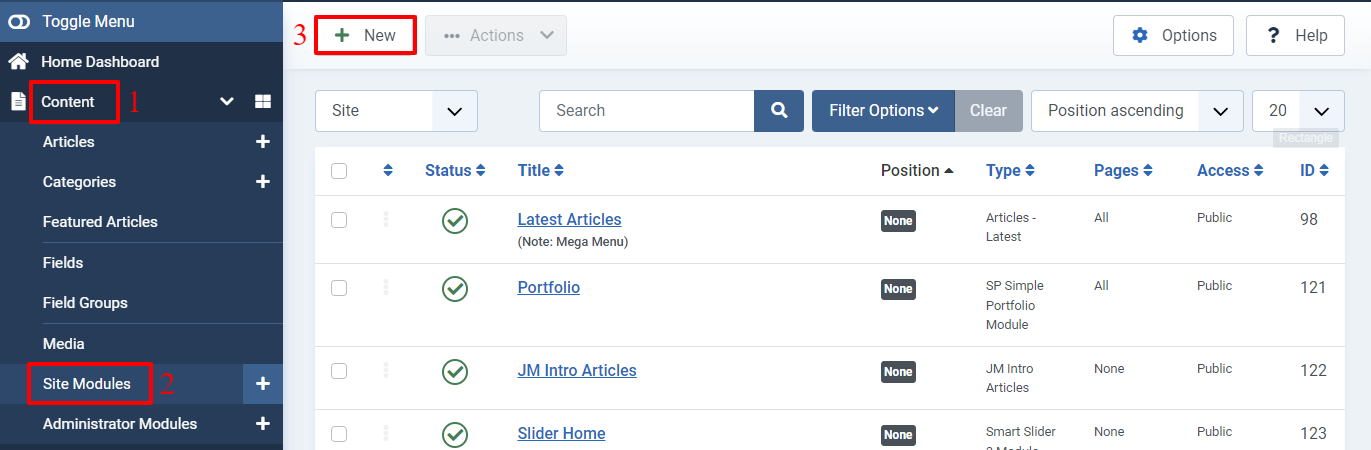
To generate the related modules, you need to go to Content > Site Modules > + New > SP Easy Image Gallery module.
Don’t forget to fill out the title, choose the album and save.
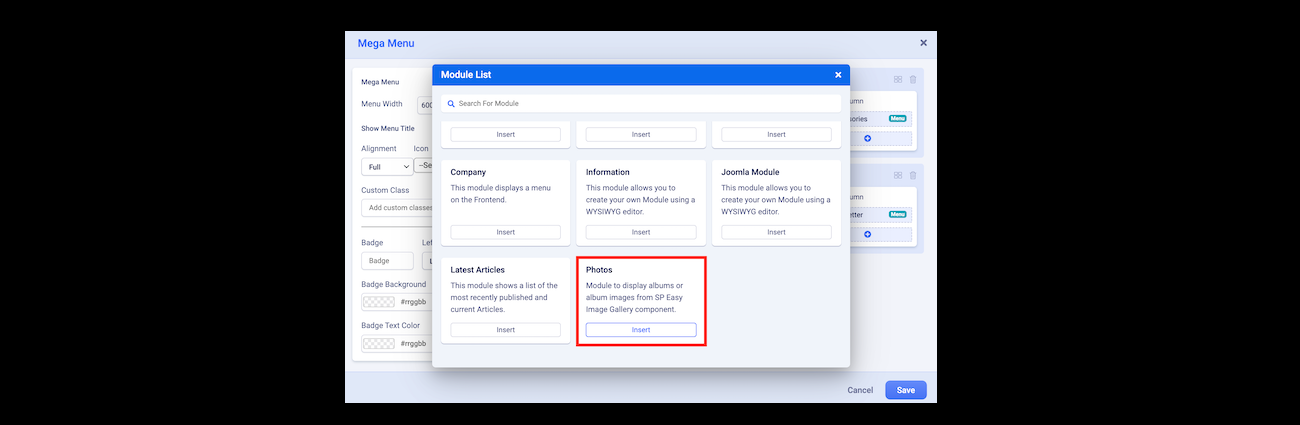
Visit the Helix Ultimate frontend editor > Look for the mega menu you generated before > Click on the Mega Menu option > Add.
Choose the photo module you generated > Add it to your mega menu > Save.
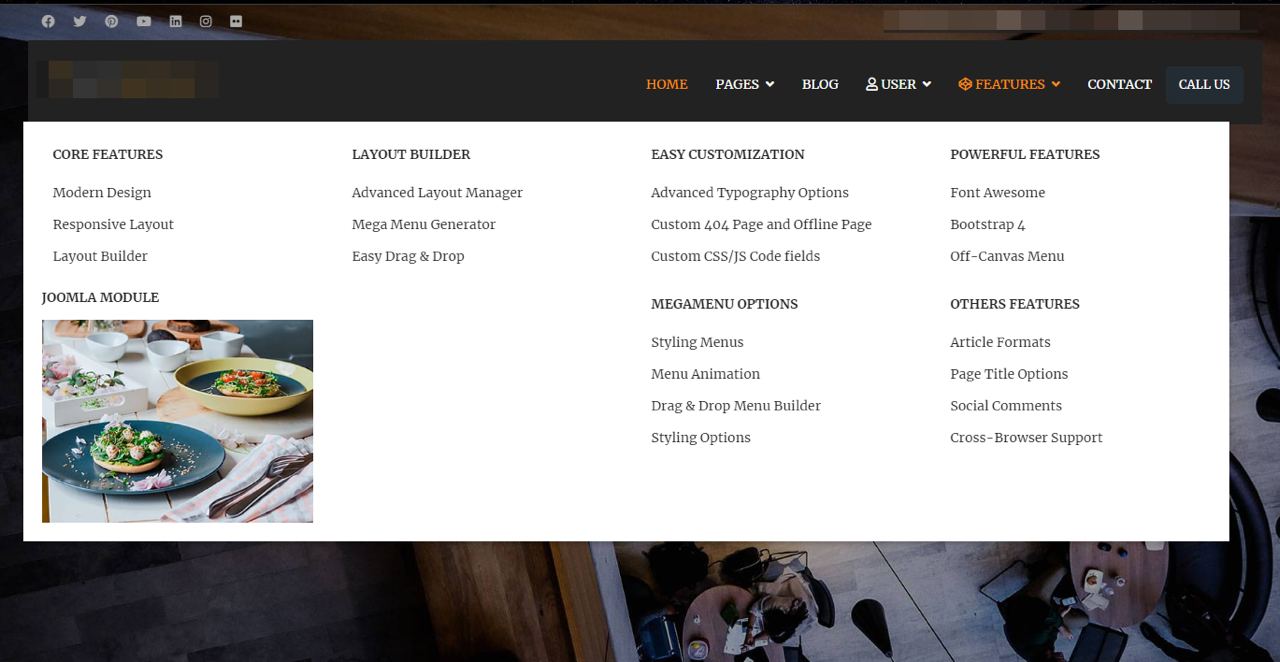
Now, let’s see the result.
Closing thoughts
With our comprehensive tutorial blog as your guide, we invite you to effortlessly set up the mega menu builder in Helix Ultimate for your esteemed website. Embark on the journey of attracting a multitude of visitors with an illustrious, well-crafted, and meticulously detailed mega menu. What are you waiting for?
Lastly, do not miss the golden opportunity to enhance your website’s allure with our vast array of high-performance, SEO-friendly, and responsive Joomla 5 Templates.
We're Content Marketing team from AgeThemes with 10+ years in open source and tech. Our mission is to deliver high-quality content tailored for users of open source CMS platforms, including Joomla and WordPress. We strive to empower our audience with valuable insights and resources to enhance their digital experiences.