In the previous article, we have introduced the overview of Helix Ultimate, today we will guide you to install Helix Ultimate in easy steps. Now you can install Helix in the following simple steps:
Step 1: First, log in to the Joomla control panel by entering the correct username and password.
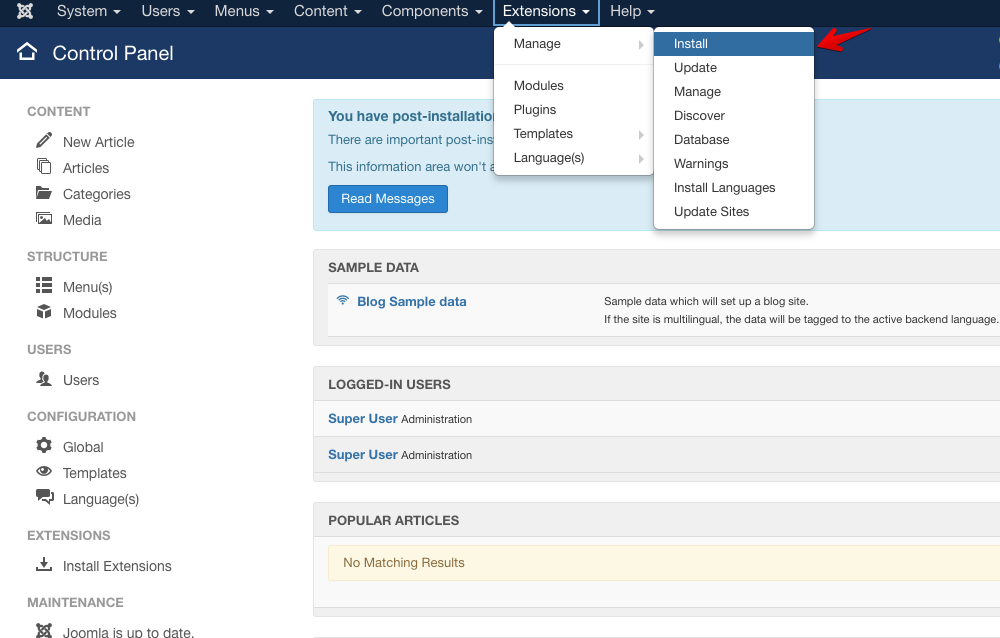
Step 2: Go to Extensions >> Manage then select Intall option.
Image by Joomshaper.
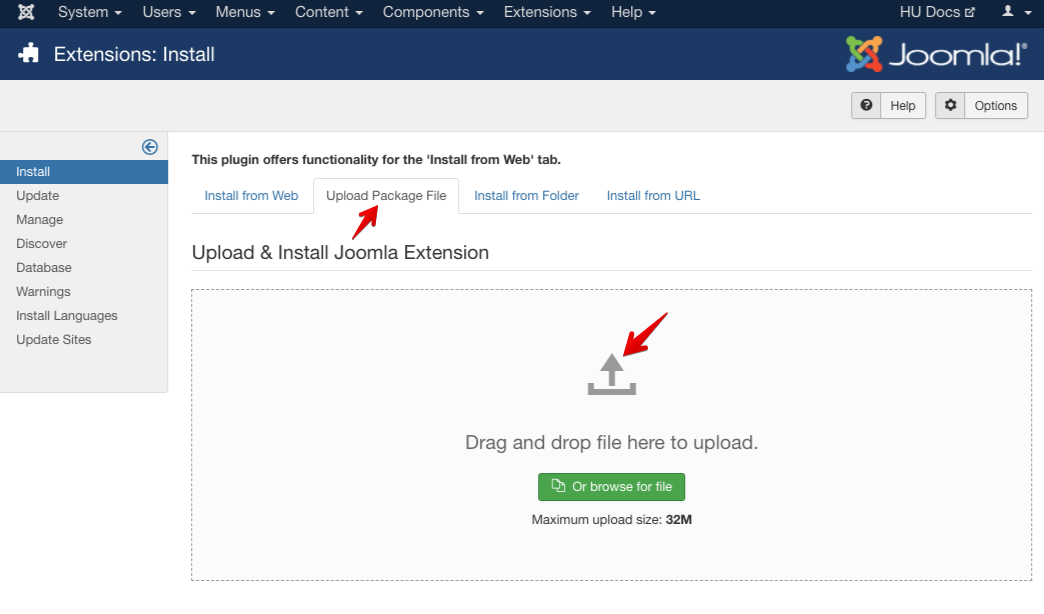
Step 3: There are 4 options, now you select the “Upload Package File” option and upload your template installation file by using either method: Method 1: Drag and drop to upload file Method 2: Click on the the file browsing button to upload file.
Once the upload is complete, Joomla will automatically install the template.
Image by Joomshaper.
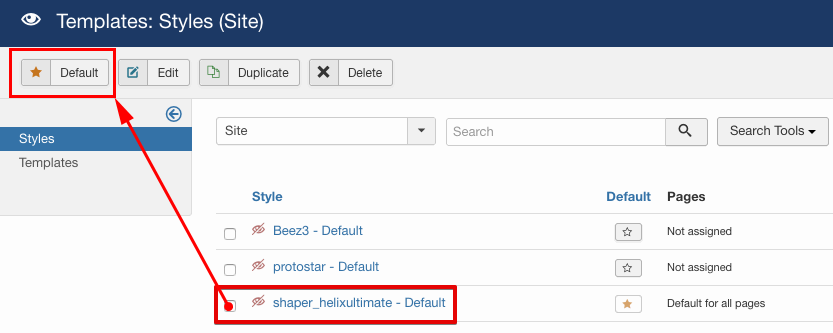
Step 4: Make Helix Ultimate the default for entire Joomla website.
Click Extensions >> Templates then select Styles and click the star button to set your template to default.
Image by Joomshaper.
That’s all of the Helix Ultimate installation process. Very simple, isn’t it?
If you have any question about this tutorial, don’t hesitate to leave a comment below. And don’t forget to share with your friends if you find it useful! Thanks! 😀
We're Content Marketing team from AgeThemes with 10+ years in open source and tech. Our mission is to deliver high-quality content tailored for users of open source CMS platforms, including Joomla and WordPress. We strive to empower our audience with valuable insights and resources to enhance their digital experiences.