As a WordPress user, you may sometimes encounter a critical error that can bring your website to a grinding halt. This error is often signified by a white screen or an error message that reads “Error Establishing a Database Connection” or “Internal Server Error.” While these errors can be concerning, there are several steps you can take to identify and resolve the issue.
In this guide, we’ll walk you through a step-by-step process to help you fix the critical error in your WordPress website.
Step 1: Check Your WordPress Database Credentials
One of the most common causes of a critical error in WordPress is an issue with the database connection. This can happen if your database credentials (username, password, database name, or host) are incorrect or have changed.
To check your database credentials:
- Log in to your WordPress admin dashboard.
- Navigate to the “Settings” > “Database” page.
- Verify that the database name, username, password, and host are correct.
- If any of the credentials are incorrect, update them and save the changes.
If the database credentials are correct, move on to the next step.
Step 2: Investigate the Error Log
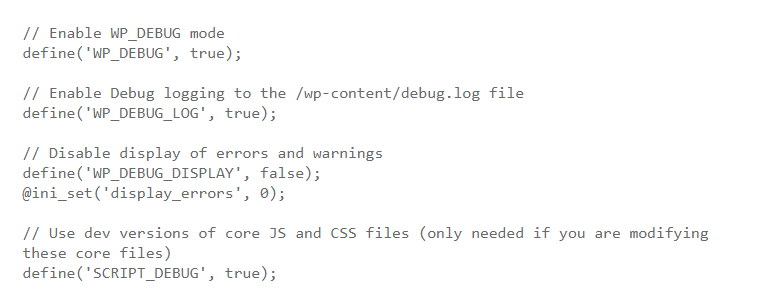
WordPress maintains an error log that can provide valuable insights into the cause of the critical error. To access the error log:
- Connect to your web server using an FTP client or your hosting control panel.
- Navigate to the
wp-content/debug.logfile (if it doesn’t exist, create it). - Open the file and look for any error messages or clues that might help you identify the root cause of the problem.
Common error messages you might find in the log include:
- “Error Establishing a Database Connection”
- “Parse error”
- “Fatal error”
- “Warning”
Make a note of any relevant error messages, as they will be helpful in the next step.
Step 3: Troubleshoot the Issue
Based on the information gathered in the previous steps, you can now start troubleshooting the critical error. Here are some common solutions to try:
1. Clear Your Browser Cache
Sometimes, a cached version of your website can cause issues. Clear your browser cache and try accessing your website again.
2. Deactivate and Reactivate Plugins
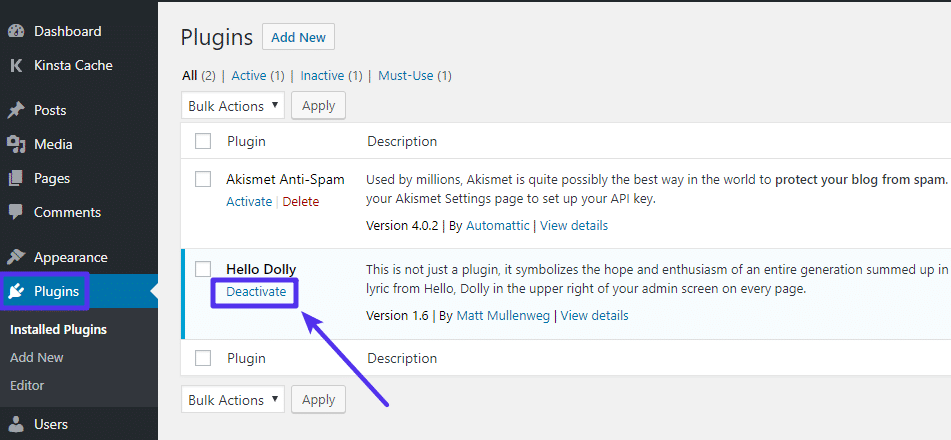
If the critical error is related to a plugin conflict, try deactivating all your plugins and then reactivating them one by one to identify the problematic plugin.
If you’re experiencing a critical error in your WordPress website, one of the troubleshooting steps you can take is to deactivate and reactivate your plugins. This process can help you identify if the issue is caused by a specific plugin conflict.
Here’s how to deactivate and reactivate plugins in WordPress:
Deactivate Plugins
- Log in to your WordPress admin dashboard.
- In the left-hand menu, click on “Plugins”.
- On the Plugins page, you’ll see a list of all the plugins installed on your website.
- Locate the plugin you want to deactivate and click on the “Deactivate” link underneath it.
- Repeat this process for all the plugins you want to deactivate.
Reactivate Plugins
- After deactivating all the plugins, go back to the Plugins page in your WordPress admin dashboard.
- Locate the plugin you want to reactivate and click on the “Activate” link underneath it.
- Repeat this process for each plugin you want to reactivate.
Reactivate Plugins One by One
If the critical error is related to a plugin conflict, it’s best to reactivate the plugins one by one to identify the problematic plugin. Here’s how:
- Deactivate all the plugins as described above.
- Reactivate one plugin at a time and test your website to see if the critical error persists.
- If the error appears after reactivating a specific plugin, that plugin is likely the cause of the issue.
- Deactivate the problematic plugin and move on to reactivating the next one.
- Repeat this process until you’ve reactivated all the plugins and identified the culprit.
Once you’ve identified the problematic plugin, you have a few options:
- Update the Plugin: Check if there is a newer version of the plugin available and update it.
- Replace the Plugin: If the plugin is causing a critical error, consider replacing it with an alternative plugin that provides similar functionality.
- Disable the Plugin: If the plugin is not essential to your website’s functionality, you can choose to keep it deactivated.
Remember, it’s always a good practice to create a backup of your WordPress website before making any significant changes, including deactivating and reactivating plugins.
3. Switch to a Default Theme
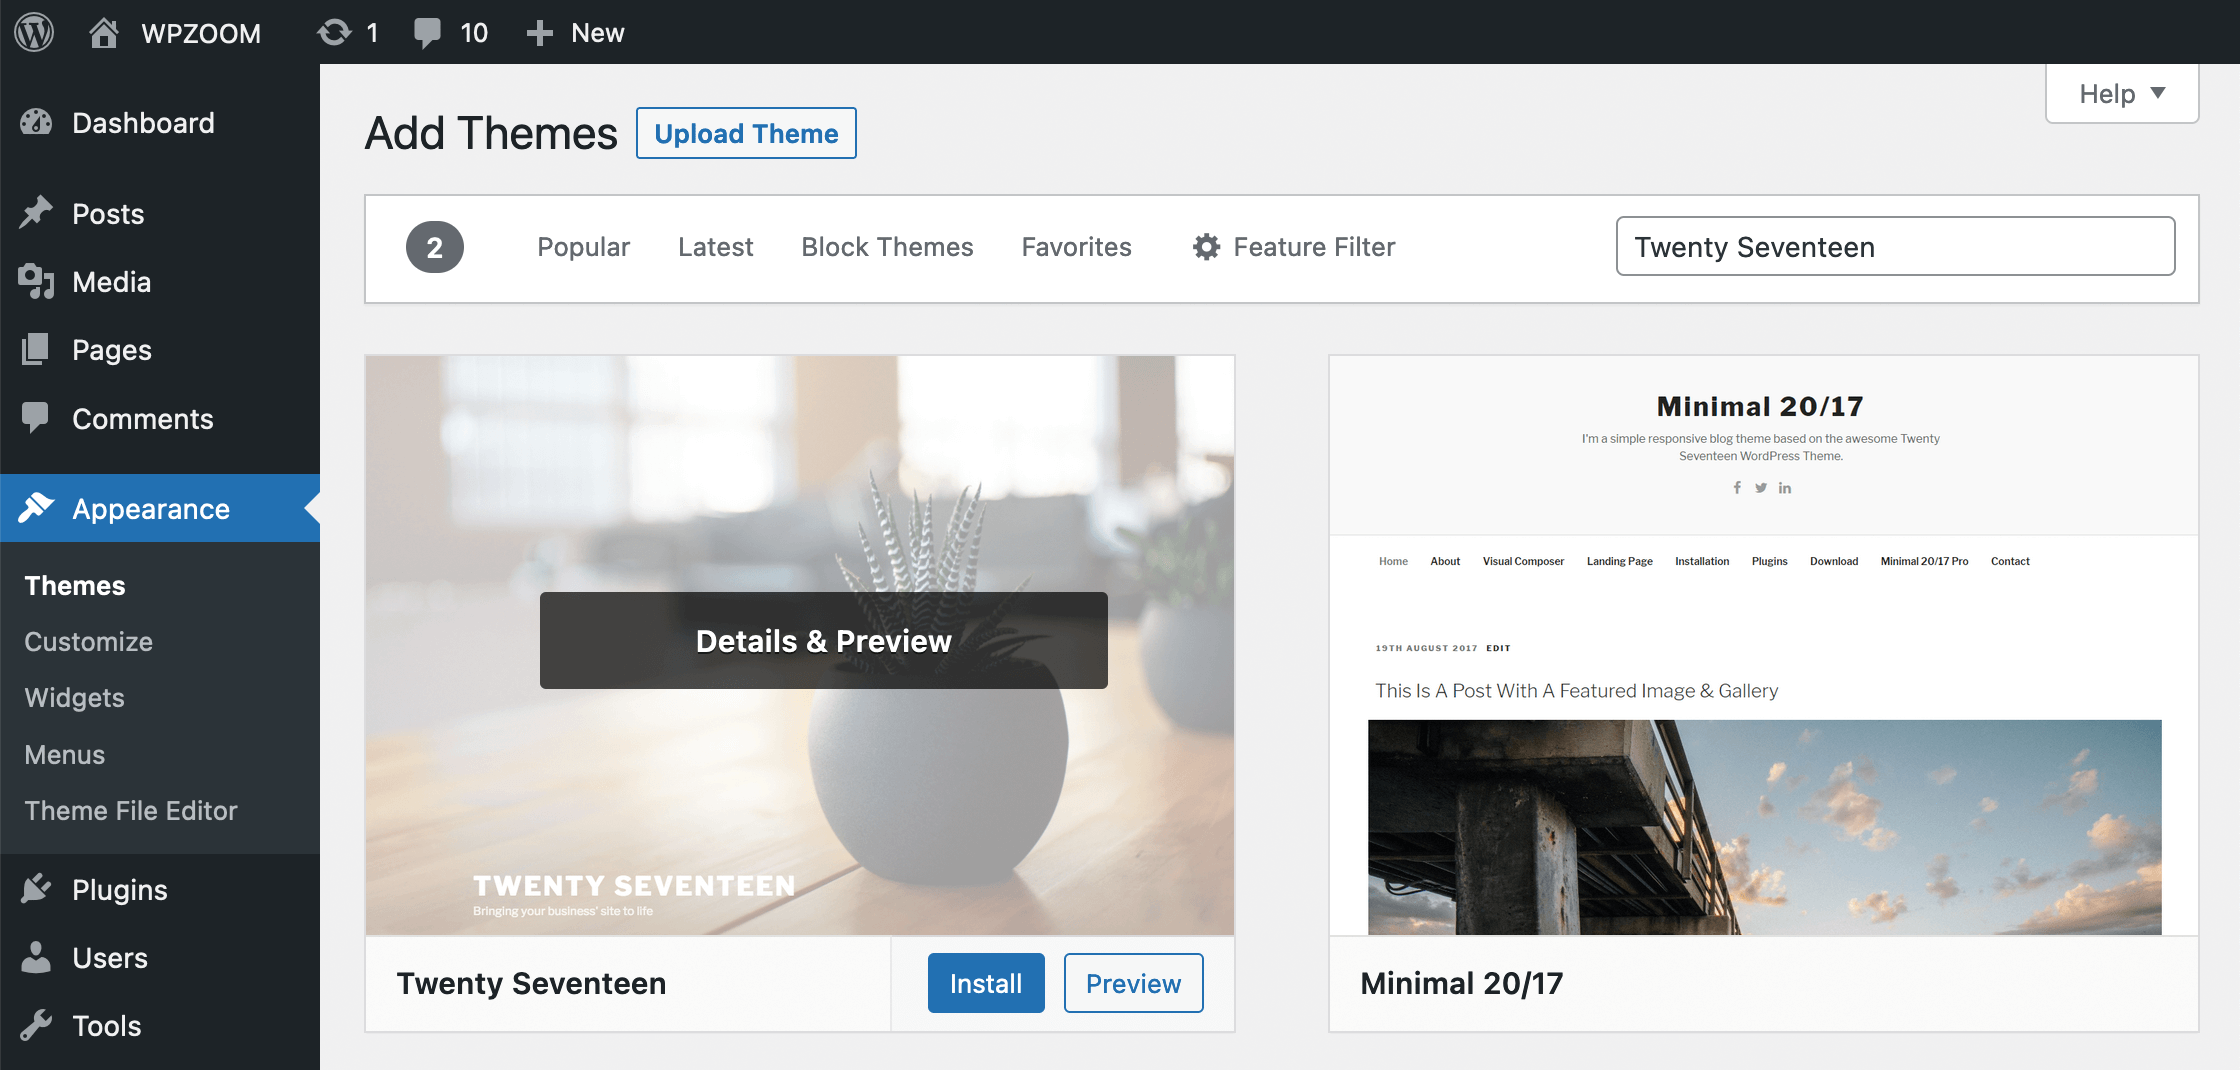
If you’re experiencing a critical error in your WordPress website, one of the troubleshooting steps you can take is to switch to a default theme. This can help you determine if the issue is caused by a theme-related problem.
The default themes in WordPress are:
- Twenty Twenty-Three
- Twenty Twenty-Two
- Twenty Twenty-One
- Twenty Twenty
- Twenty Nineteen
- Twenty Eighteen
Here’s how to switch to a default theme in WordPress:
- Log in to your WordPress admin dashboard.
- In the left-hand menu, click on “Appearance” and then “Themes”.
- On the Themes page, you’ll see a list of all the themes installed on your website.
- Locate the default theme you want to use (e.g., Twenty Twenty-Three) and click on the “Activate” button underneath it.
Alternatively, you can switch to a default theme directly from the WordPress admin dashboard:
- Log in to your WordPress admin dashboard.
- In the left-hand menu, click on “Appearance” and then “Customize”.
- In the Customizer, click on the “Themes” option in the left-hand menu.
- You’ll see a list of available themes, including the default themes. Hover over the theme you want to use and click the “Activate” button.
After activating the default theme, your WordPress website should load without the critical error. This confirms that the issue was related to your previous theme.
If the critical error persists, it’s likely that the issue is not theme-related, and you may need to try other troubleshooting steps, such as:
- Deactivating and reactivating plugins
- Checking for conflicts with other plugins or the WordPress core
- Updating WordPress, plugins, and your theme to the latest versions
- Contacting your web host for further assistance
4. Update WordPress, Plugins, and Themes
Ensure that your WordPress installation, plugins, and themes are up-to-date. Outdated software can sometimes cause critical errors.
5. Increase PHP Memory Limit
If the critical error is due to a memory limit issue, you can try increasing the PHP memory limit by adding the following line to your wp-config.php file:
define('WP_MEMORY_LIMIT', '256M');
- Repair the WordPress Database: In some cases, a corrupted database can cause critical errors. You can try repairing the database by going to the “Tools” > “Database Repair” page in your WordPress admin dashboard.
- Reinstall WordPress: If none of the above steps work, you may need to reinstall WordPress. This should only be a last resort, as it will require you to restore your website’s content, settings, and customizations.
Conclusion
Dealing with a critical error in WordPress can be a frustrating experience, but by following the steps outlined in this guide, you should be able to identify and resolve the issue. Remember to always keep your WordPress installation, plugins, and themes up-to-date, and regularly monitor your website’s error log to stay ahead of any potential problems.
If you’re still unable to fix the critical error, don’t hesitate to reach out to your hosting provider or the WordPress support community for further assistance.


