Migrating a WordPress site to a new host or server can seem daunting, especially if you’re concerned about downtime. Fortunately, with the right steps, you can execute this transition smoothly and ensure your site remains accessible to visitors. In this blog post, we’ll guide you through the process of moving your WordPress site with minimal disruption.
Why Move Your WordPress Site?
Moving your WordPress site can be a strategic decision for various reasons. Here are some common motivations for making the switch:
1. Performance Improvements
Speed: A new host may offer faster servers and better performance, enhancing your site’s loading times.
Uptime: More reliable hosting can lead to reduced downtime, ensuring your website is accessible to users at all times.
2. Cost Effectiveness
Better Pricing Plans: Switching to a host that offers more competitive pricing can save you money, especially if your current plan does not meet your needs.
Value for Money: You might find a host that provides more features at a similar cost, improving your overall value.
3. Enhanced Features
Advanced Technologies: Newer hosts may offer better technologies like SSD storage, caching solutions, or CDN integration.
Security: More robust security measures can protect your site from threats and vulnerabilities.
4. Scalability
Growth Support: If your site is growing, you may need a host that can scale with your traffic and resource needs.
Flexible Plans: New hosting providers may offer more flexible plans that allow you to upgrade or downgrade your resources easily.
5. Customer Support
Quality of Service: A host with excellent customer support can make a significant difference in resolving issues quickly.
Availability: 24/7 support can be invaluable, especially for businesses that operate online continuously.
6. Specific Hosting Needs
Managed Hosting Options: If you prefer a hands-off approach, managed WordPress hosting can provide automatic updates, backups, and security.
Specialized Services: Some hosts cater specifically to certain industries or types of websites, offering tailored services.
7. Technical Issues
Frequent Downtime: If your current host experiences frequent outages, it may be time to look for a more reliable option.
Performance Bottlenecks: Slow loading times or resource limitations can hinder your site’s performance, prompting a move.
8. User Experience
Better Interface: A hosting provider with a user-friendly interface makes managing your site easier, especially for beginners.
Migration Tools: Some hosts offer tools that simplify the migration process, making it less stressful.
9. Reputation and Reviews
Community Feedback: If your current host has poor reviews or a bad reputation, a move can help improve your site’s reliability.
Recommendations: Positive experiences shared by others can influence your decision to switch.
Preparation: Before You Start
Choose Your New Host: Research and select a hosting provider that meets your needs. Consider factors like speed, uptime, customer support, and scalability.
Backup Your Site: Always start with a complete backup of your site. You can use plugins like UpdraftPlus or BackupBuddy to make this process easier.
Check Domain Settings: Make sure you have access to your domain registrar. You’ll need to update your DNS settings once the migration is complete.
Step-by-Step Migration Process
Step 1: Set Up Your New Hosting Account
Sign up for your new hosting plan.
Set up a temporary domain or subdomain (like temporary.yourdomain.com) to upload your WordPress files.
Step 2: Transfer Files to the New Host
Connect via FTP: Use an FTP client like FileZilla to connect to both your old and new hosting accounts.
Download Files: Download your WordPress files from the old host (usually in the public_html directory).
Upload Files: Upload these files to the new host’s temporary domain or subdomain.
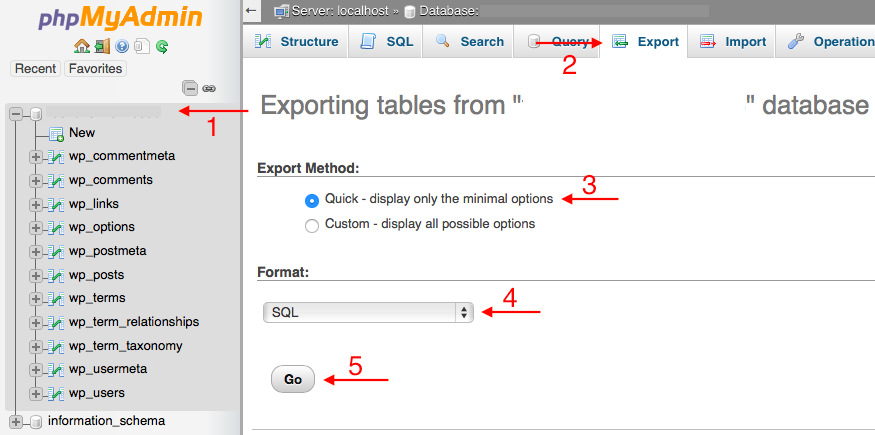
Step 3: Export the Database
Access phpMyAdmin: Log into your old hosting account and access phpMyAdmin.
Select Your Database: Find the database associated with your WordPress site.
Export the Database: Click on the database and select the “Export” tab. Choose the “Quick” export method and download the SQL file.
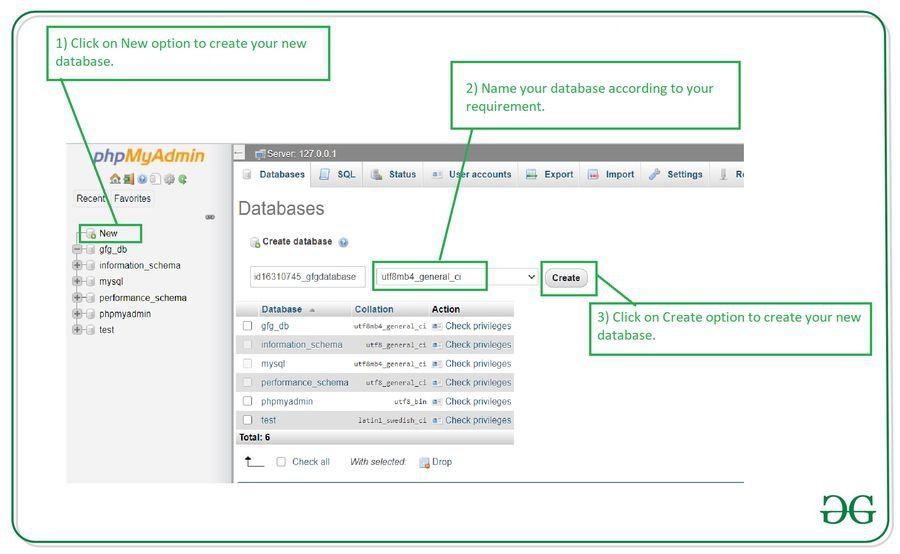
Step 4: Create a New Database on the New Host
Access Control Panel: Log into your new hosting account’s control panel.
Create Database: Navigate to the MySQL databases section and create a new database.
Create a User: Add a new user and assign it to the database with all privileges.
Note Credentials: Make sure to note the database name, username, and password for later use.
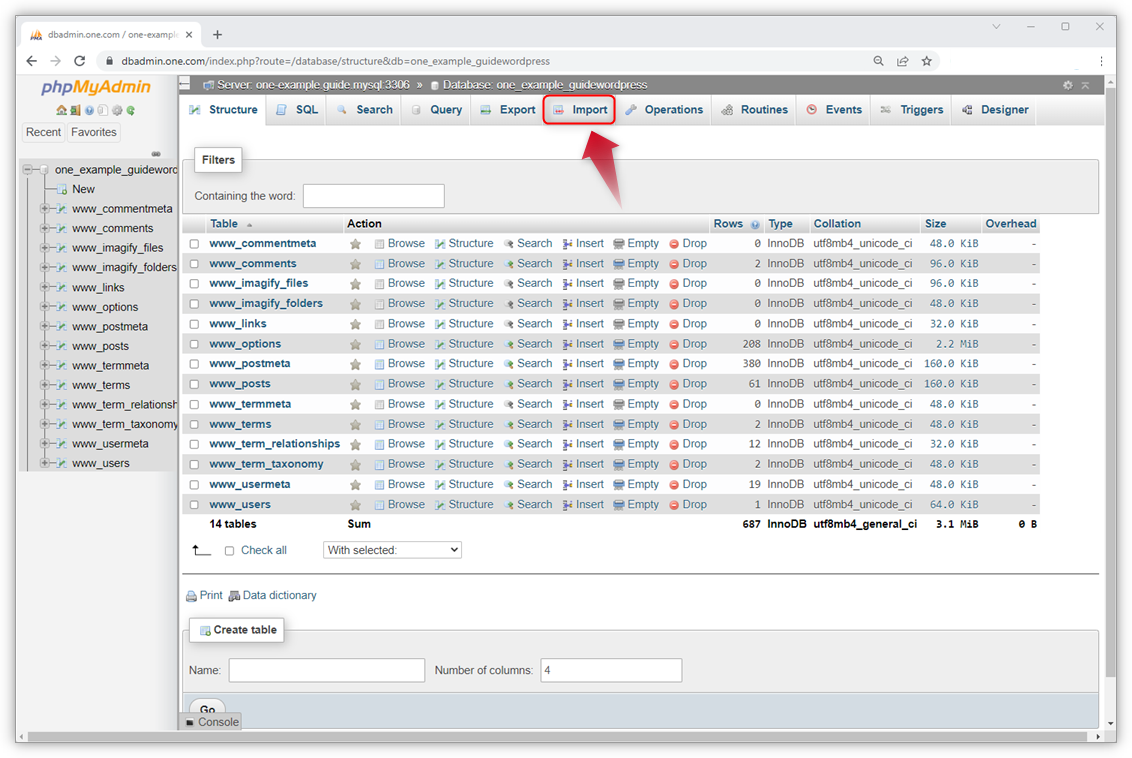
Step 5: Import the Database
Access phpMyAdmin on the New Host: Go to phpMyAdmin on your new hosting account.
Select Your New Database: Click on the new database you created.
Import the SQL File: Click on the “Import” tab, choose the SQL file you exported earlier, and click “Go.”
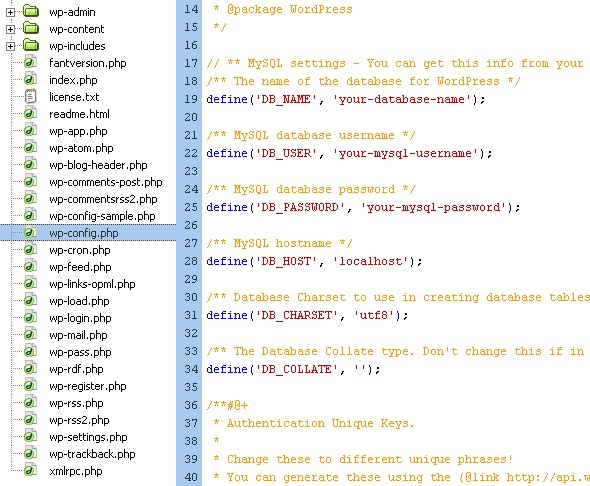
Step 6: Update wp-config.php
Edit wp-config.php: In the files you uploaded, locate the wp-config.php file.
Update Database Details: Change the database name, username, and password to the new credentials you created.
Save Changes: Save the changes to the wp-config.php file.
Step 7: Test Your Site on the New Host
Visit your temporary domain or subdomain to check if your site is functioning correctly. Make sure all links, images, and functionalities are working as expected.
Step 8: Update DNS Settings
Access Your Domain Registrar: Log into your domain registrar’s control panel.
Change Nameservers: Update your domain’s nameservers to point to the new host.
Propagation Time: DNS changes can take up to 48 hours to propagate, but most changes are often completed within a few hours.
Step 9: Test Your Live Site
After the DNS changes have propagated, test your live site by entering your domain URL. Ensure everything is working perfectly.
Step 10: Cleanup
Once you confirm that everything is functioning well on the new host, you can delete the temporary site and any backups from the old host.
Step 11: Monitor Your Site
Keep an eye on your site’s performance and error logs for a few days after the migration. This will help you catch any issues early.
Conclusion
Migrating your WordPress site to a new host or server does not have to result in downtime. By following these steps carefully, you can ensure a seamless transition. Always remember to back up your site before making any changes, and double-check your settings after the migration. With the right preparation and execution, you can enjoy a faster, more reliable hosting experience without any hassle!
Feel free to share your migration experiences or ask any questions in the comments below!
We're Content Marketing team from AgeThemes with 10+ years in open source and tech. Our mission is to deliver high-quality content tailored for users of open source CMS platforms, including Joomla and WordPress. We strive to empower our audience with valuable insights and resources to enhance their digital experiences.

")
")

?")
")


