In this tutorial we are going to see how to customize Helix Ultimate Framework with custom code, ex: CSS, JavaScript, Metatags, links and verification code by using the custom fields in that section of settings.
Before < / head >
Any code placed here will appear in the < head > section of all pages of your Joomla website. Your code can be HTML meta tag or JavaScript code etc. This feature is useful when you need to add verification code, extra Meta Tags, HTML Links Tags and other metadata.
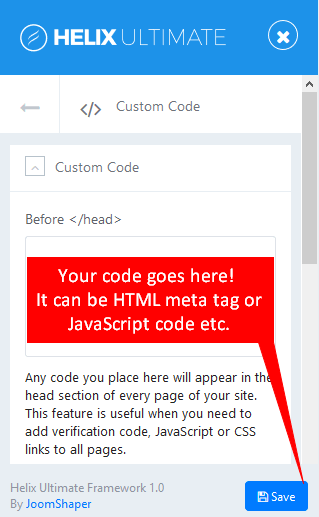
Image by Joomshaper
Before < / body >
Any code placed here will appear at the bottom of the body section of all pages of your Joomla website. It can be JavaScript code etc. This feature is useful when you want to add a tracking code for a state counter such as Google Analytics or Clicky.
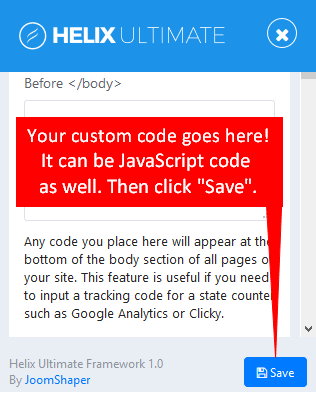
Image by Joomshaper
Custom CSS
It allows you to add your styles or overwrite default CSS from a template or extension using custom CSS. This option is only for CSS code adn useful for small deisgn changes.
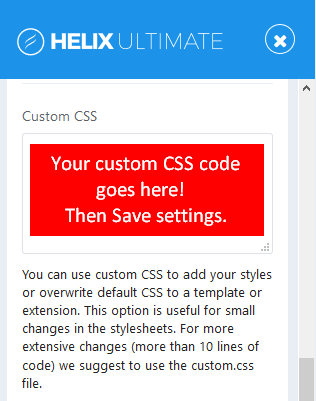
Image by Joomshaper
If you want to change more extensive design, you should use the custom.css file. And you have to create a new file inside /css folder of template because custom.css file doesn’t exist by default.
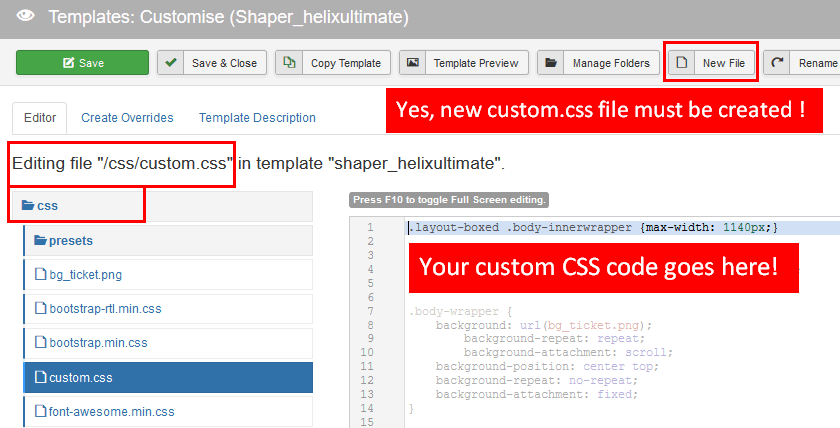
Image by Joomshaper
Note: CSS cascades in reverse, meaning rules that appear later always take precedence over rules that appear earlier.
Those methods help you to create custom sites, that will stay exactly how you want them to if there are any new update.
Custom JavaScript
You can add Custom JavaScript here and click on the “Save” button. It will load your custom Javascript code after all other JavaScript files (except special hardcoded occasions).
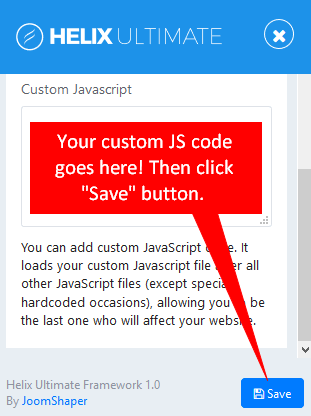
Image by Joomshaper
For longer custom JavaScript code, you should use the custom.js file instead. And you have to create a new file inside /js folder of template because by default this file doesn’t exist.
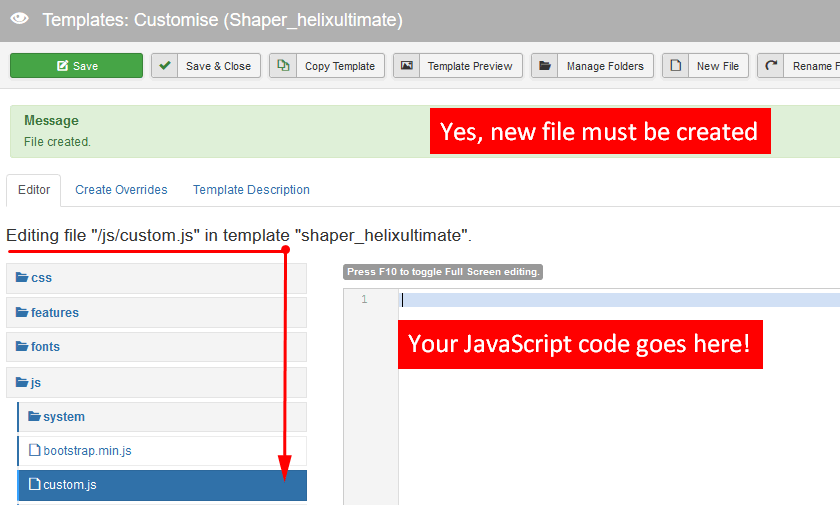
Image by Joomshaper
That’s all! Don’t forget to share with your friends if you find this post is helpful! If you have any question about this tutorial, don’t hesitate to leave a comment below. And don’t forget to share with your friends if you find it useful! Thanks! 😀


