Adding audio files and creating playlists in WordPress can enhance your website’s user experience, especially if you’re a musician, podcaster, or educator. WordPress provides built-in tools that make it easy to upload and manage audio content. In this post, we’ll walk you through the steps to add audio files and create playlists on your WordPress site.

Step 1: Upload Audio Files to WordPress
Before you can create a playlist, you need to upload your audio files to your WordPress media library.

1.1 Access the Media Library
- Log in to your WordPress admin dashboard.
- Navigate to Media > Add New.
1.2 Upload Your Audio Files
- You can either drag and drop your audio files into the upload area or click the Select Files button to choose files from your computer.
- Once uploaded, your audio files will appear in the media library.
Supported Audio Formats
WordPress supports various audio formats, including:
- MP3
- WAV
- OGG
- M4A
Make sure your audio files are in one of these formats for optimal compatibility.
Step 2: Insert Audio Files into a Post or Page
Now that your audio files are uploaded, you can insert them into a post or page.

2.1 Create or Edit a Post/Page
- Go to Posts or Pages in your dashboard.
- Select an existing post/page or click Add New to create one.
2.2 Add Audio Files
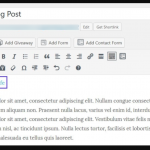
- In the post editor, click on the Add Media button.
- Select the audio file(s) you want to insert from the media library.
- You can choose to insert the audio file as a link or embed it directly into the content.
- Click the Insert into post button.
2.3 Use the Audio Block (Gutenberg)
If you’re using the Gutenberg editor, you can also add audio files using the Audio block:
- Click the + icon to add a new block.
- Search for the Audio block, then select it.
- Upload a new audio file or select one from the media library.
- Click Select, and the audio will be embedded in your post.
Step 3: Create an Audio Playlist
Creating a playlist allows you to group multiple audio files together, making it easier for visitors to listen.

3.1 Insert a Playlist
- While editing your post or page, click on the Add Media button.
- Select the Create Audio Playlist option from the left sidebar.
- Choose the audio files you want to include in your playlist from the media library.
3.2 Organize Your Playlist
- After selecting your audio files, click the Create a new playlist button.
- You can reorder the files by dragging and dropping them.
- Once satisfied, click the Insert Playlist button.
3.3 Customize Playlist Settings
- You can customize how the playlist appears on your site. Options include:
- Show download links: Allow users to download the audio files.
- Show tracklist: Display a list of all tracks in the playlist.
Step 4: Publish Your Post or Page
Once you’ve added your audio files and created your playlist, it’s time to publish your content.
- Click the Publish button to make your post/page live.
- Your visitors can now play the audio files and enjoy your curated playlists!
Bonus: Use Audio Plugins for Enhanced Features
While WordPress provides basic audio functionality, you may want to explore plugins for advanced features. Here are a few popular options:
- Compact WP Audio Player: Simple and lightweight audio player for embedding audio files.
- MP3 Music Player by Sonaar: A customizable audio player with playlist capabilities.
- Seriously Simple Podcasting: Perfect for podcasters, allowing easy management of episodes.
Conclusion
Adding audio files and creating playlists in WordPress is a straightforward process that can significantly enhance your website’s content. Whether you’re sharing music, podcasts, or educational materials, these features will engage your audience and improve their experience. Don’t hesitate to experiment with different plugins to find the best fit for your needs!
Happy audio uploading!


