Template Installation
Install Template Package
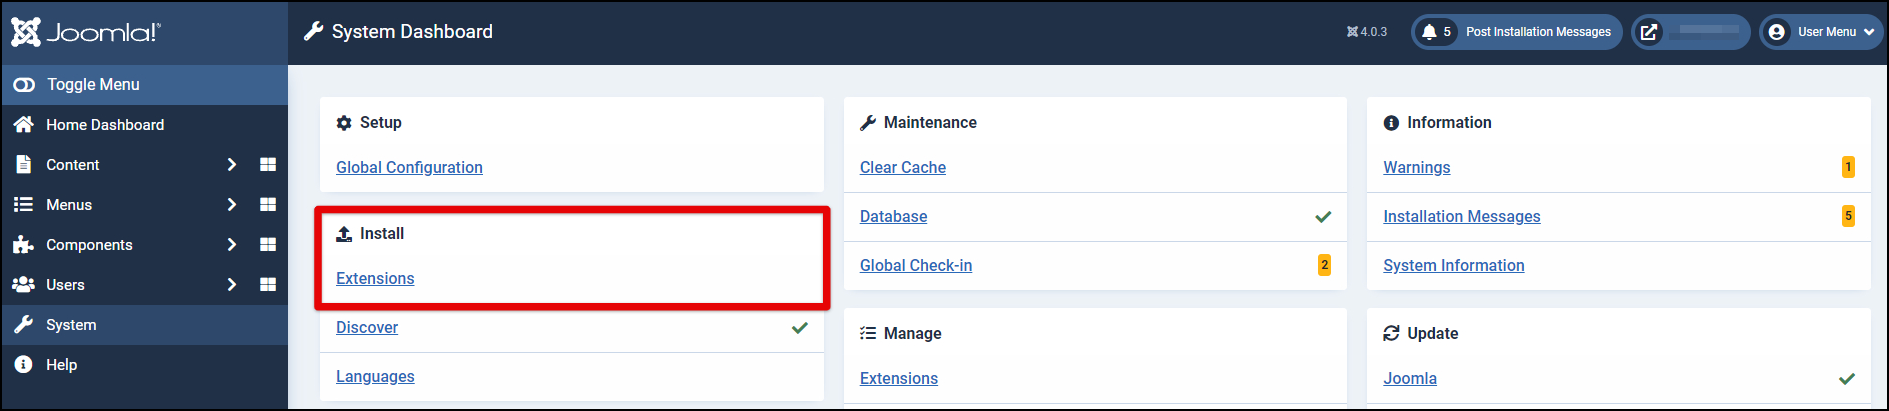
Template package use for a new website that you want to build content from zero without sample data, or using for your website with existing data. To install it, just download the Template Install-Package file and install it via Extension Manager (By go to Joomla! Admin panel > System > Install Extensions, browser file and click to upload). After finish, you can go to Template Manager, switch to default Joomla! template to new template.
To start to build your website, you can use standard Joomla! elements such as Articles, Modules, etc. Other extensions such as Page Builder, Slider, Portfolios, etc. you can see download links and documents via part Third-party Build-in Document. All extensions are FREE, you can download and install it without extra payment.
Install Quickstart Package (package available in PRO version)
This package only available in PRO version, so if you’re using FREE version, you can go to Joomla! templates list, find your template and purchase PRO version. After that, you just re-download PRO package, unzip it, so you can see Quickstart package, read this Quickstart Installation guide know how to install it.
Template Content & Styles
How to Display Main Menu
Open a new browser window and type in the URL, which will be similar to http://www.your-site-name-here.com/administrator or, if you have Joomla! installed on your local computer, http://localhost/your-folder-name-here/administrator. Here you will have to log in as an Administrator or Super Administrator.
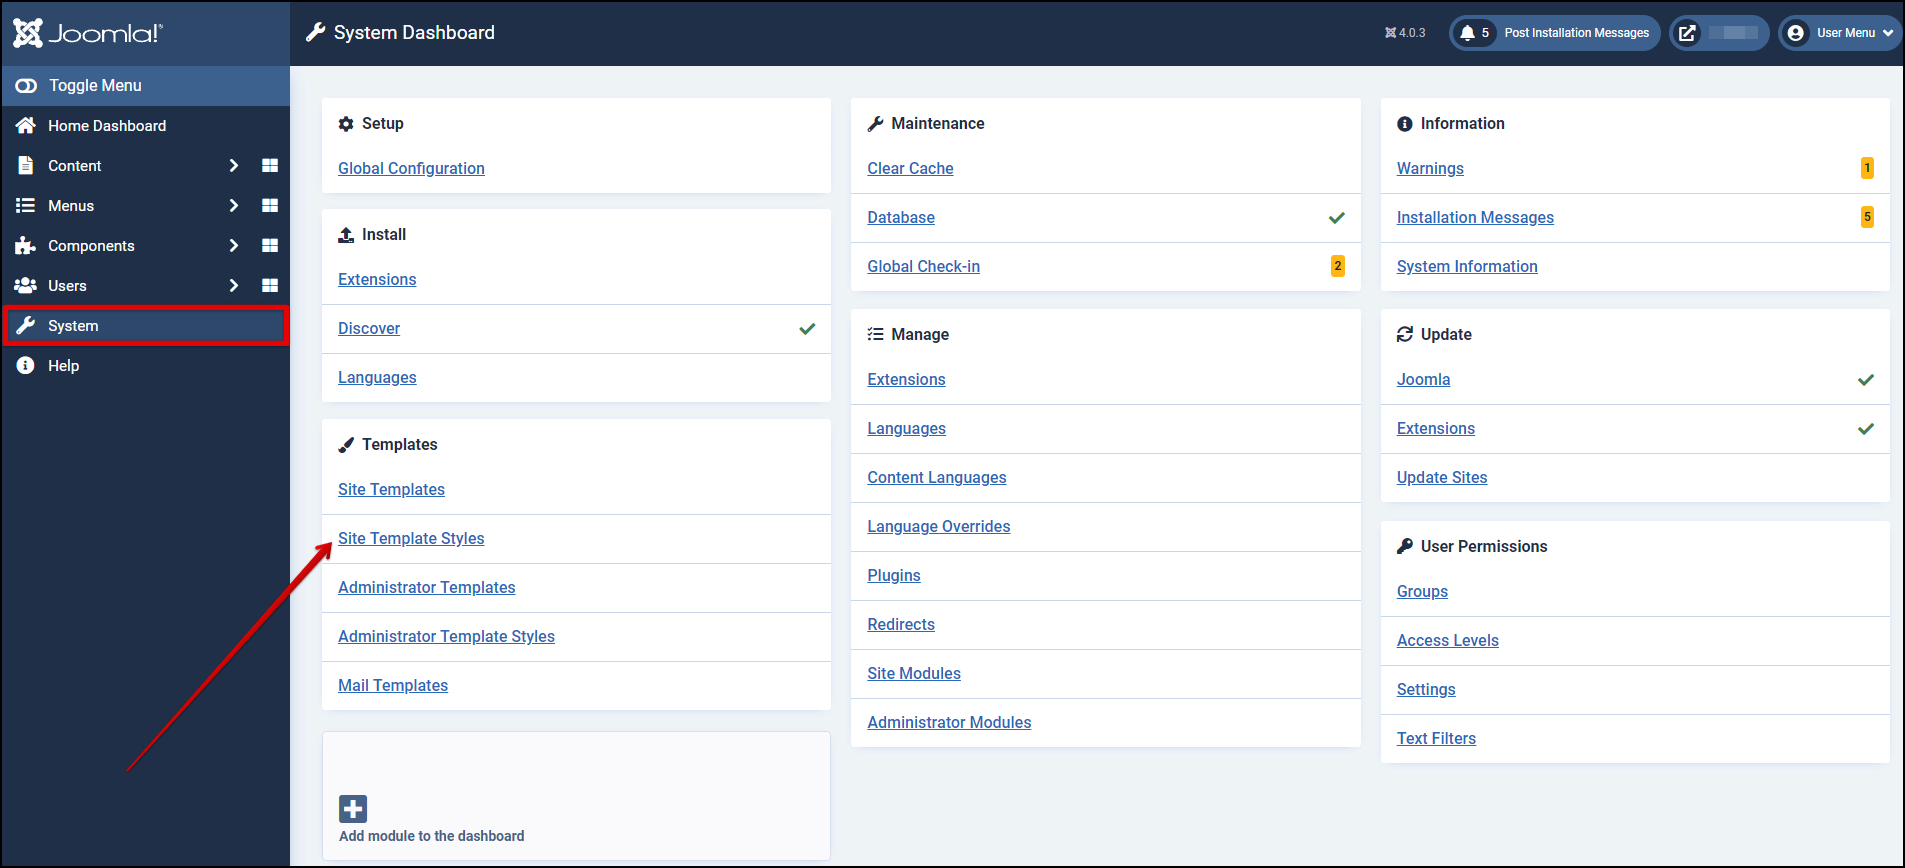
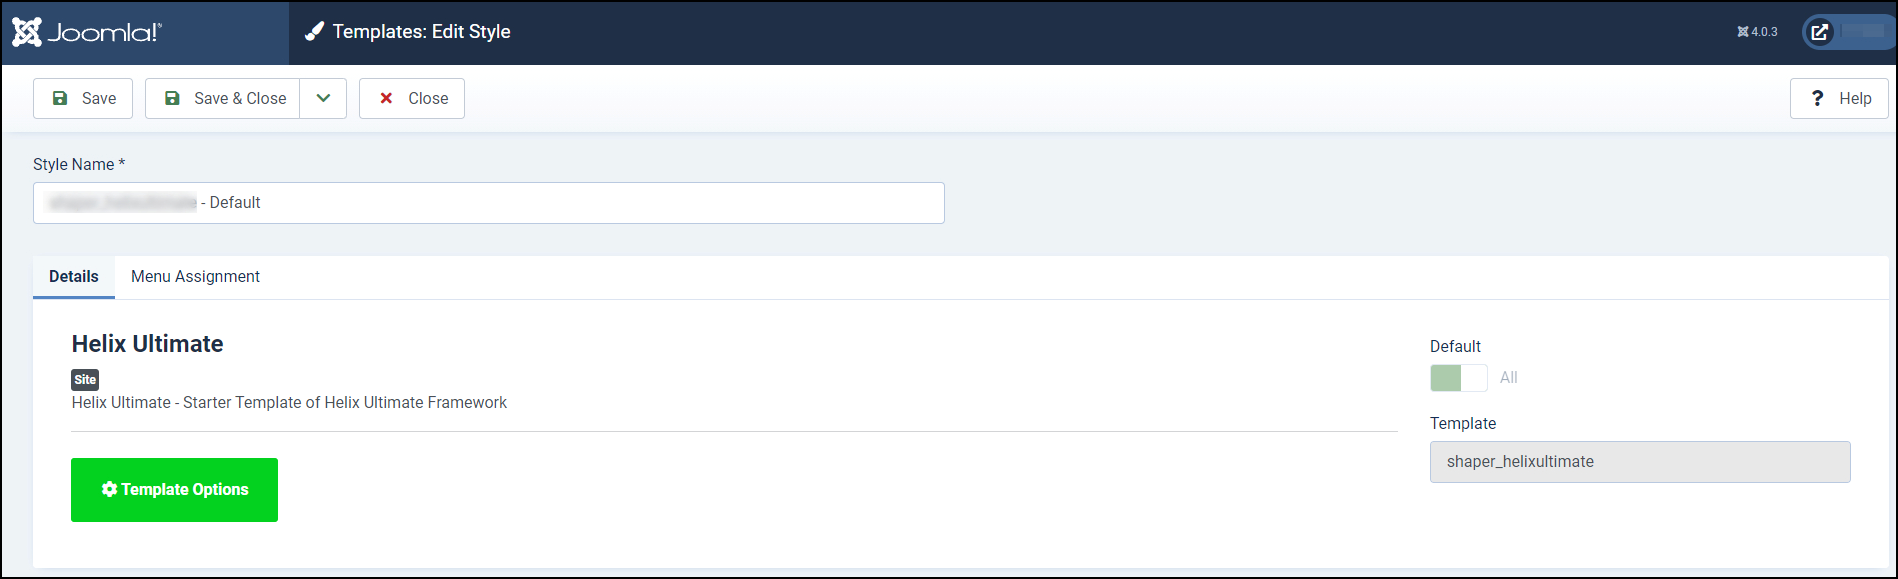
Go to “System” / “Site Templates Style” / “[template_name]-default”. This is where you edit template styles.
Please click the button “Template Options“.
Please click Menu > Menu Builder and choose “Main Menu” at Menu Type.
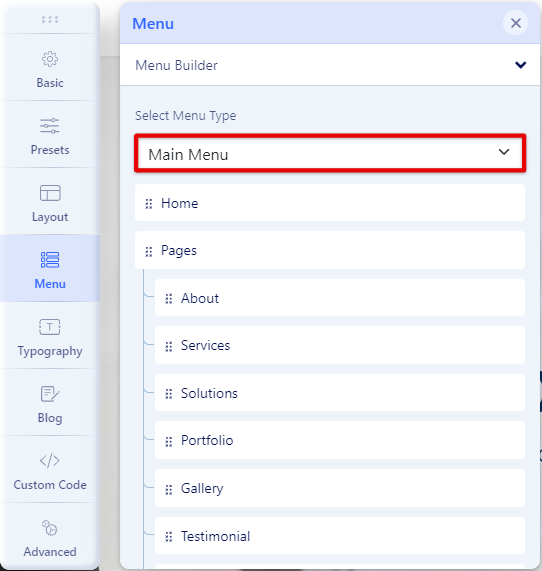
Click the Save toolbar button to save the Main Menu. To leave without saving click the Cancel toolbar button.
Add Menu Items to Your Menu
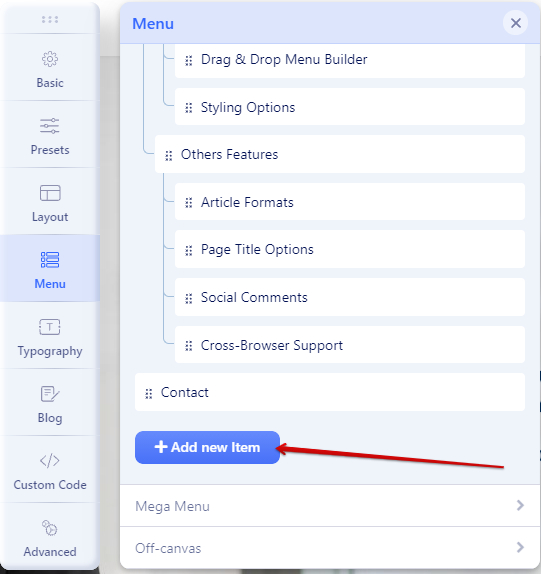
To Create a New Menu Item:
- Select Menu → Menu Builder → [name of the menu] → Add New Menu Item. For example, if a Menu is called “Main Menu”, select Menu → Menu Builder → Main Menu → Add New Menu Item.
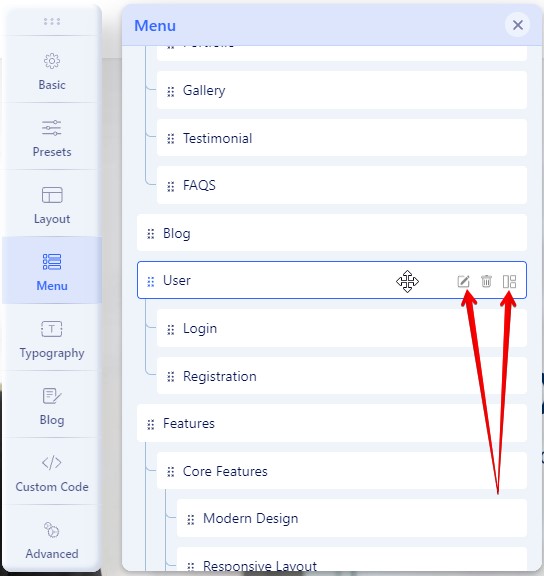
To Edit a Menu Item:
- Select Menu → Menu Builder → [name of the menu. For example, if a Menu is called “Main Menu“, select Menu → Menu Builder → Main Menu. Then either click the title of the menu item in the table list or select the menu item checkbox and click the “Edit” icon in the toolbar.
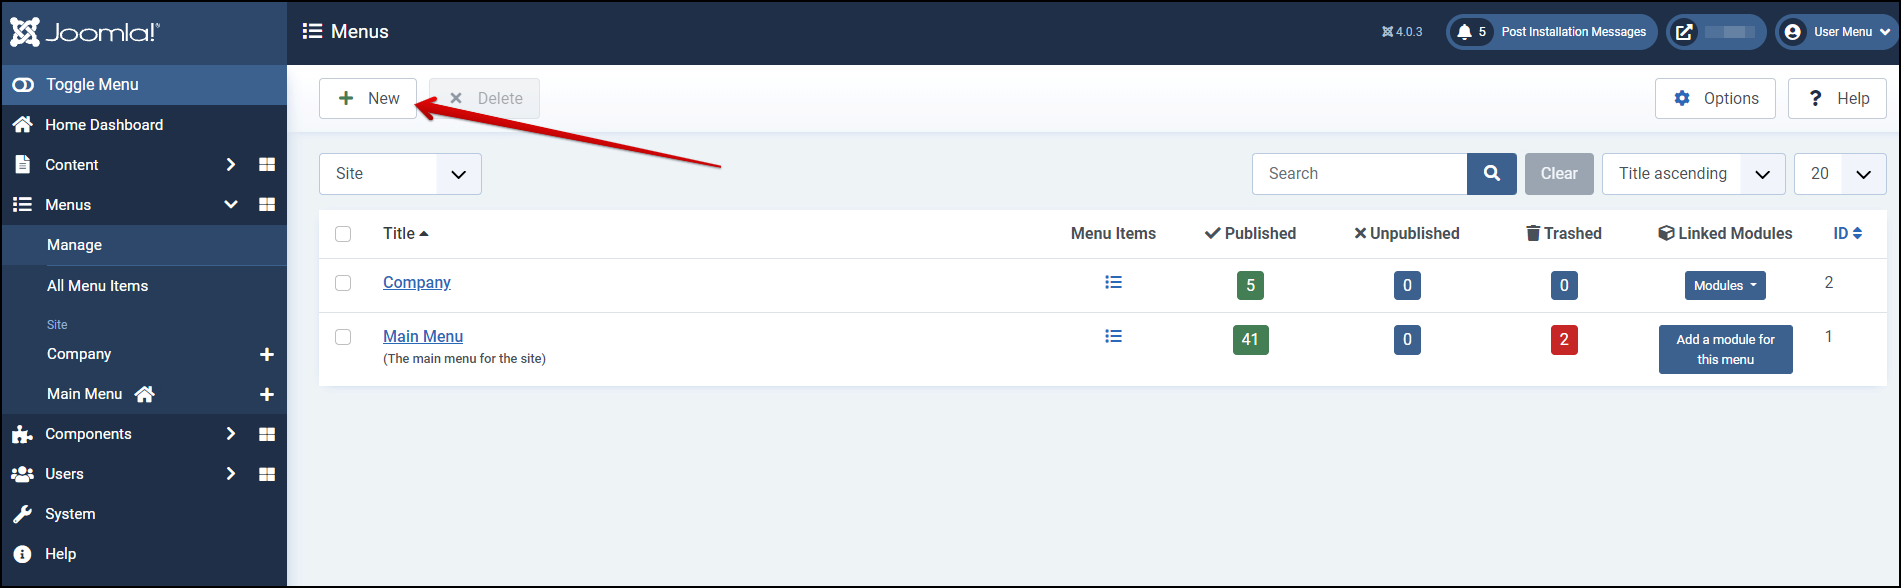
How to Add a New Menu
Within the site administration panel, select Menus from the menu bar in the upper left corner. From the drop-down list, choose “Manage” then choose “New”.
3. Fill in the “Title”, “Menu Type” and a “Description”:
- Title *: A proper title for the menu. This is used to identify the menu in the Menu Manager in the backend.
- Menu type *: This should be a unique identification name used by Joomla! to identify this menu. Spaces are not allowed but you may use the ‘-‘ character such as news-menu.
- Description: A description of the menu, useful for your own reference.
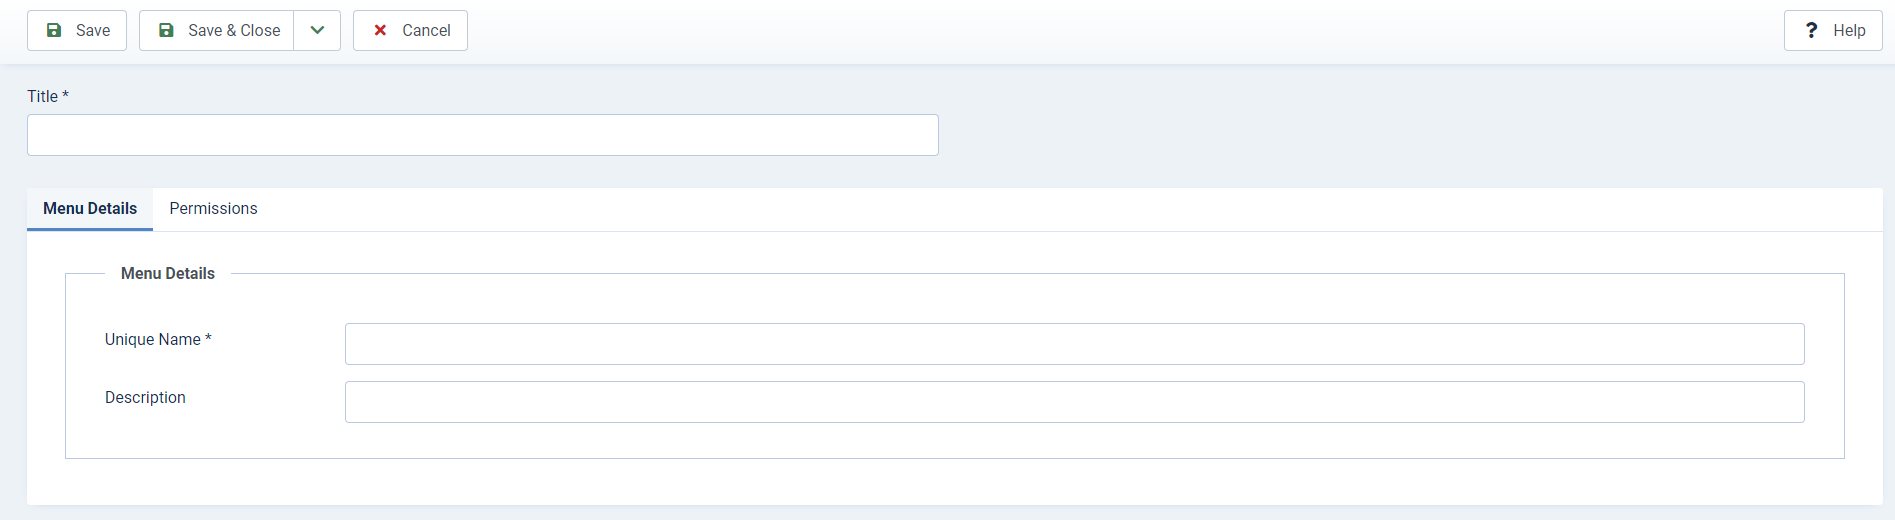
Click the Save or the Save & Close toolbar button to create the new menu. The Save & Close button will return you to the Menu Manager. To leave without saving click the Cancel toolbar button.
4. If you saved and closed, you will see your new menu in the list of Menus.
How to make menu navigation for the one-page template?
For Joomla! Onepage templates, all content must be placed in a single page. Therefore, all links in the navigation menu should be able to jump or teleport readers/visitors to many different positions throughout the page. These navigation links are called anchor links.
A page jump is made up of two parts: the base link, and the anchor.
- The base link: This is actually the link of your homepage, and is put for each menu item.
- The anchor: This is the spot where your readers will be moved/teleported to. It’s based on the ID of a content element, such as a section.
In order to get the ID of any single element, you’ll need to open the page with SP Page Builder and find the Section ID of the row to which you want to jump.
Take this example, you want to create a menu item called Services that points to a section on your homepage, so that when your site visitors click on it, they will get transported to a place where information about the services your company provides.
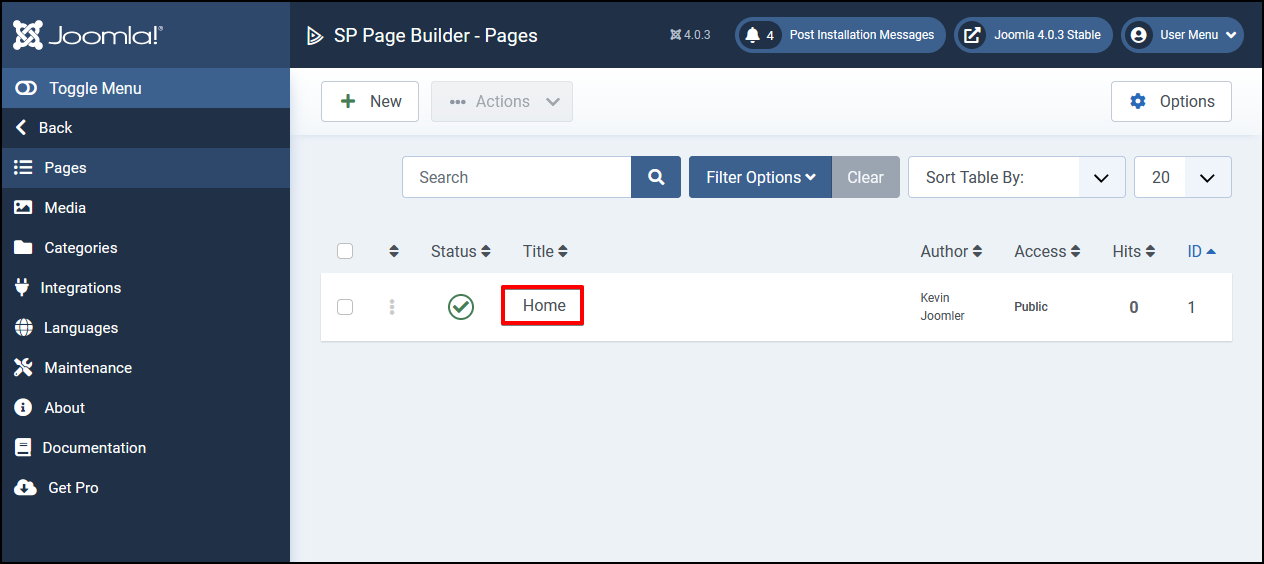
For that instance, from the Home Dashboard in the backend of your Joomla! 4 website, navigate to Components > SP Page Builder:

Click on the page title to open SP Page Builder Editor:
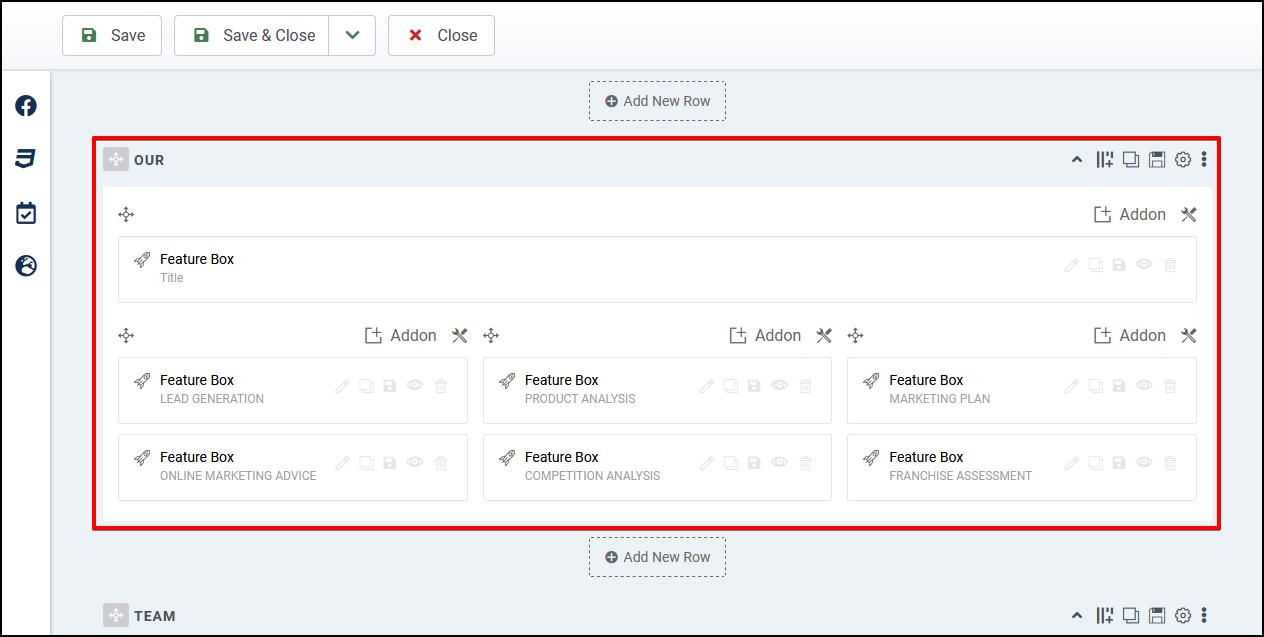
Here, find the section you want your readers/visitors to jump to when they click the anchor link on your menu.
As mentioned, we’re talking about the Services. And in my case, here it is! This row is the section, the part which my visitors will get moved to.
Now, open Row Options:
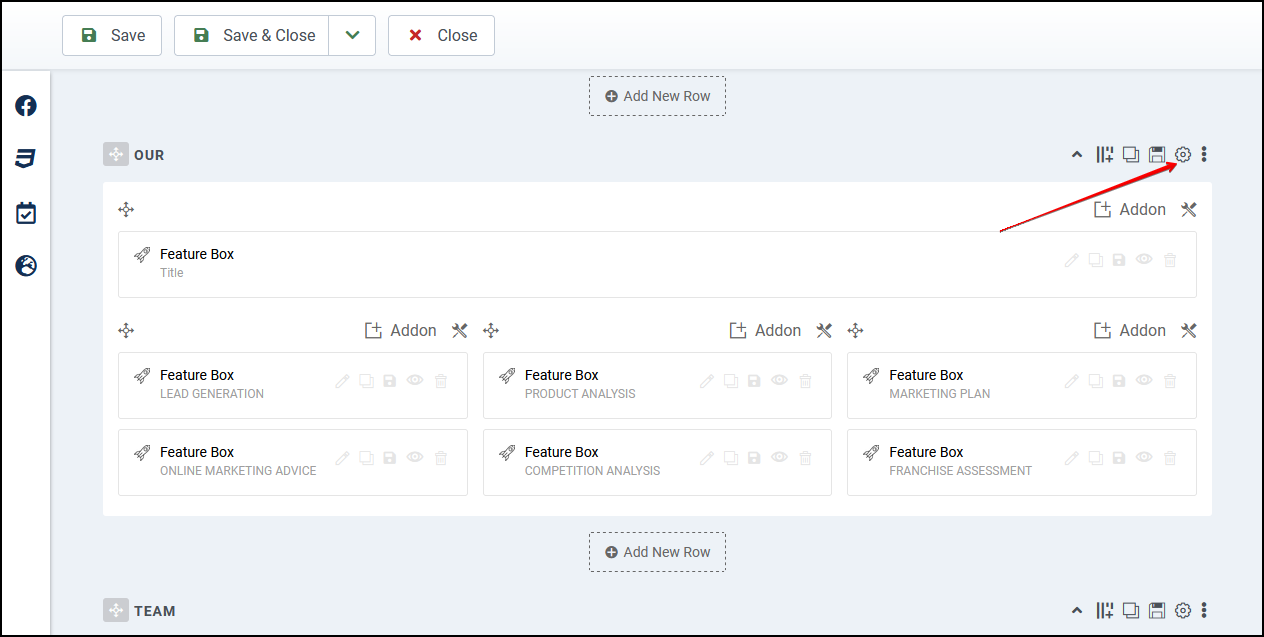
Scroll down and find the Section ID. It is used to create an anchor that makes up a page jump we’re talking about.
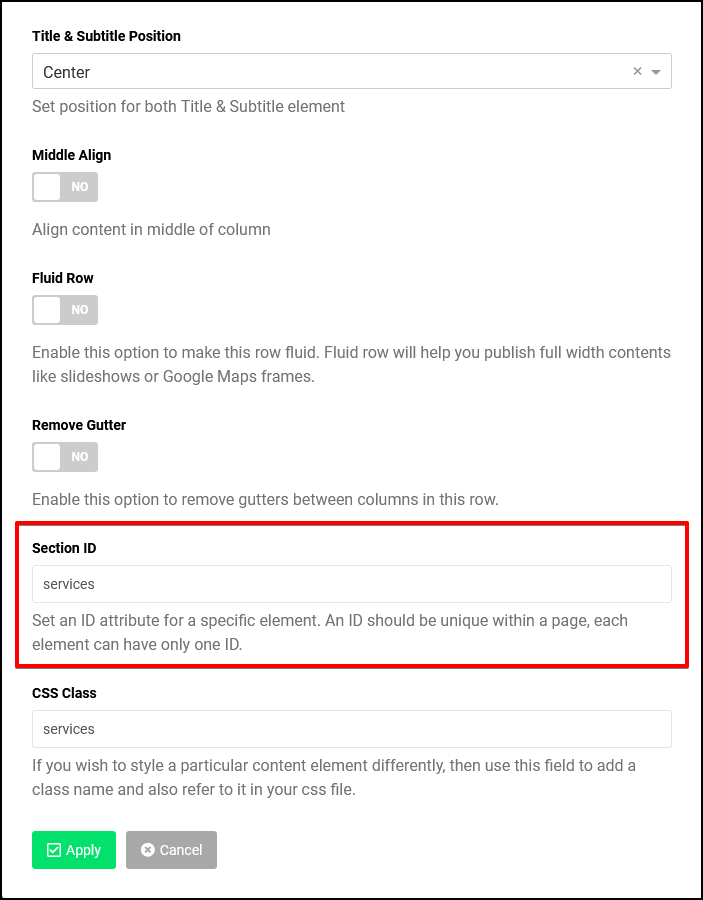
Copy or note down the row’s Section ID.
Now, via the edit screen of the Services menu item (or you can also create a new one), select URL (System Links > URL) as the menu item type, then put the anchor #services or whatever you copied in the previous step into the Link field. Just put a # first and then paste the Section ID right after it.
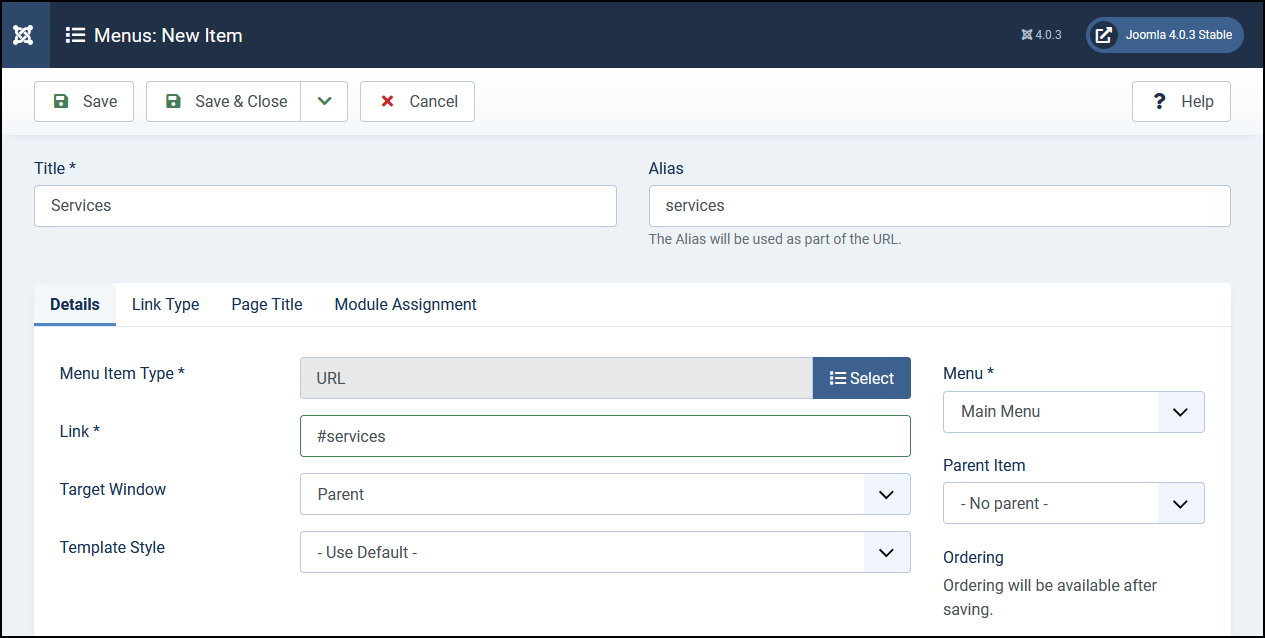
Click Save & Close to apply your changes.
Bottom, Footer, and other modules
– How to Access?
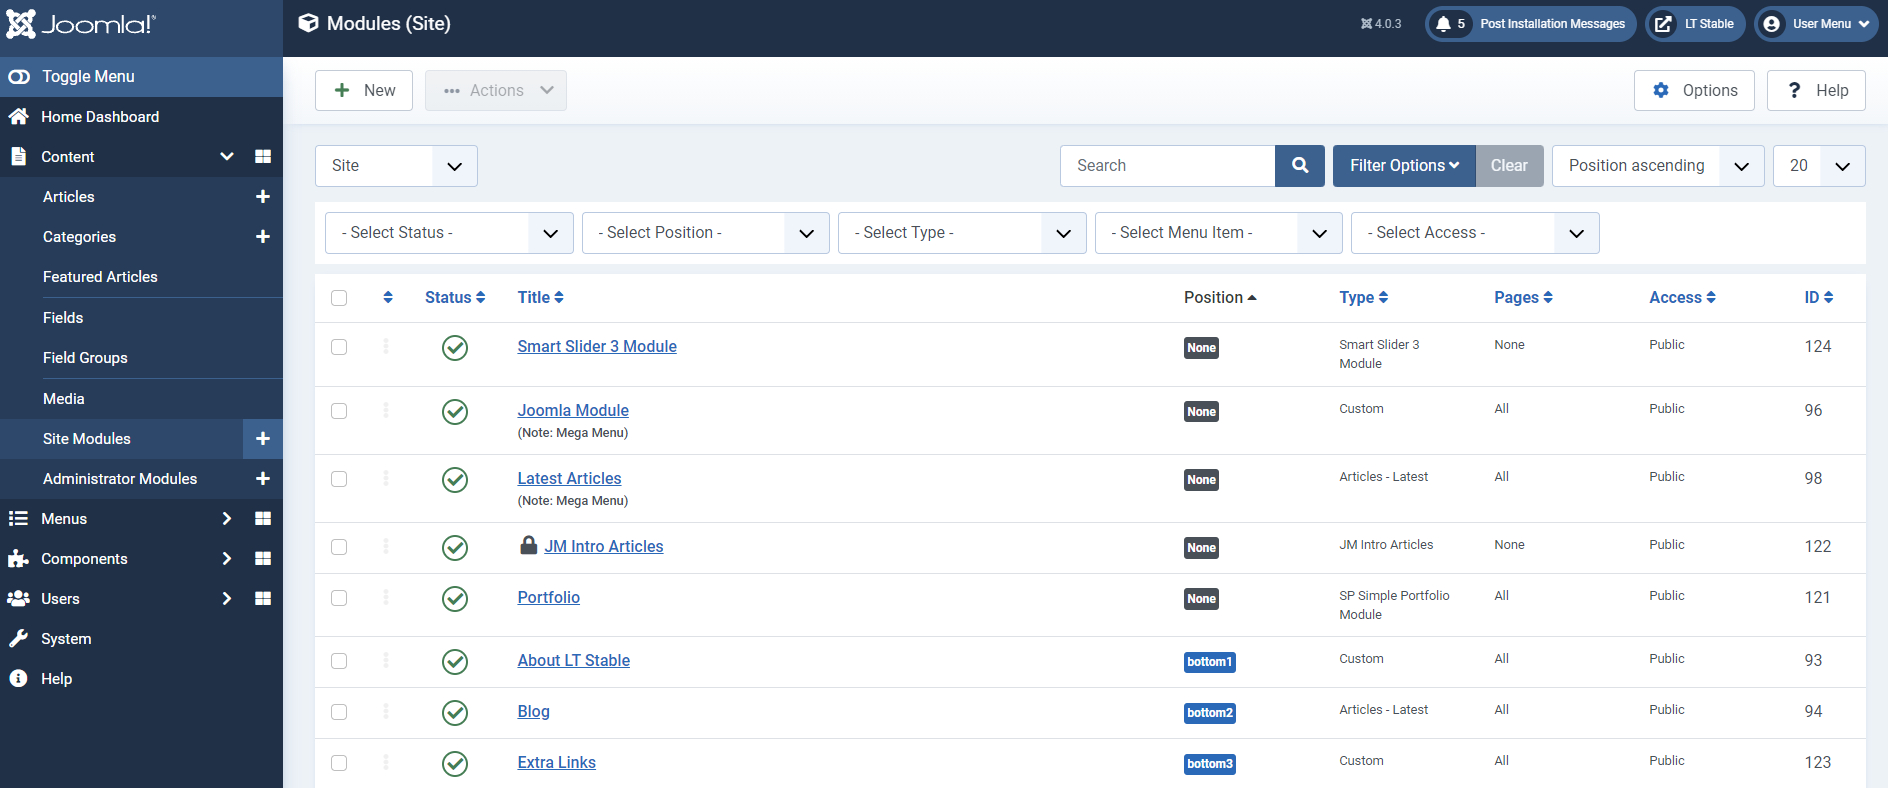
From the Dashboard select “System” / “Site Modules”
– After that, click on the ‘New’ button in the toolbar to create a new Module Item, or select a Module by double-clicking the Module’s Title or check the
“check box” and click on the “Edit” button.
– You will now see a screen with a list of all of the modules on your website.
– How to edit existing modules?
Bottom modules place at position ‘bottom1’, ‘bottom2’, ‘bottom3’ and ‘bottom4’, you can find it via Module Manager with ‘Select Position’.
Footer modules based on position ‘footer1’ and ‘footer2’ as well.
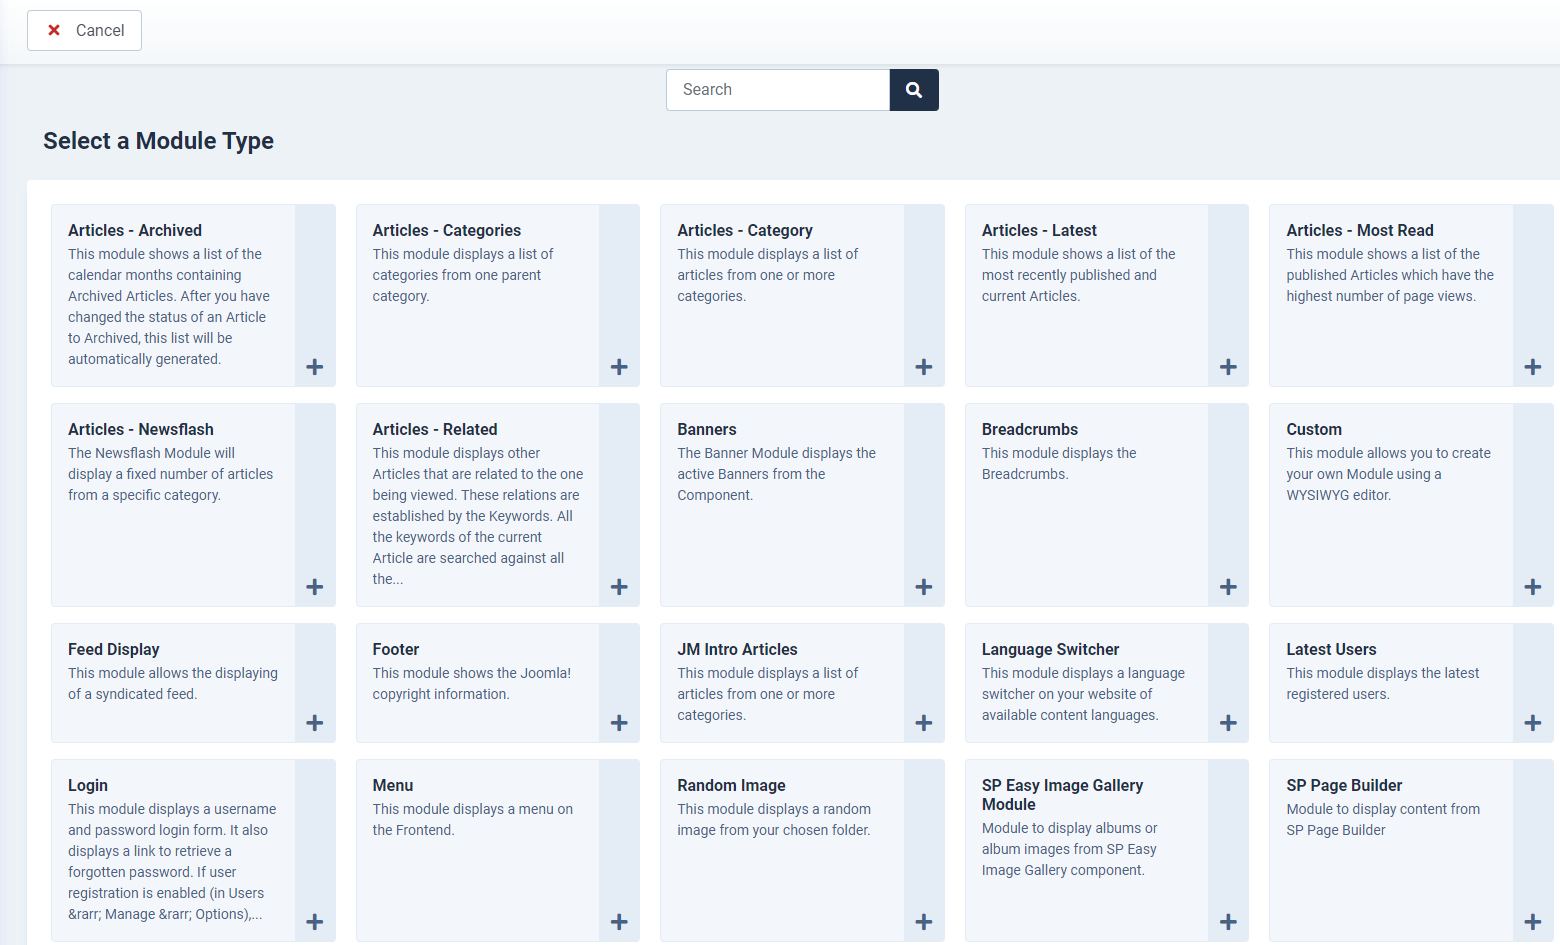
– How to Create New?
When creating a new Module, you will be presented with a modal popup window. Choose the module type by clicking on the module name to be taken to the ‘edit’ details screen.
– How to Edit Modules?
From this screen you can search module by Filter: Site or Administrator; Select Status, Select Position, Select Type, Select Access and Select Language. And you can edit existing modules, publish/ unpublish modules, and even delete modules should you need to.
MODULE TAB
1. Title: The Title for this item. This may or may not display on the page, depending on the parameter values you choose.
2. Position: Click the button for the drop-down window to select Module position by available positions in a Template(s) installed.
3. Status: The published status of this item.
- Published: Item is visible in the front end of the site.
- Unpublished: Item will not be visible to guests in the front end of the site. It may be visible to logged-in users who have edit state permission for the item.
- Archived: Item will no longer show on blog or list menu items.
- Trashed: Item is deleted from the site but still stored in the database. It can be permanently deleted from the database with the Empty Trash function in Article Manager.
4. Start Publishing: Date and time to start publishing. Use this field if you want to enter content ahead of time and then have it published automatically at a future time.
5. Finish Publishing: Date and time to finish publishing. Use this field if you want to have content automatically changed to Unpublished state at a future time (for example, when it is no longer applicable).
6. Access: Select the viewing access level for this item from the list box. The access levels will depend on what has been set up for this site to display.
7. Language: Select the language for this item. If you are not using the multi-language feature of Joomla, keep the default of ‘All’.
8. Note: Item note. This is normally for the site administrator’s use (for example, to document information about this item) and does not show in the front end of the site.
MENU ASSIGNMENT TAB
– Module Assignment: Click for drop-down choice of module assignment.
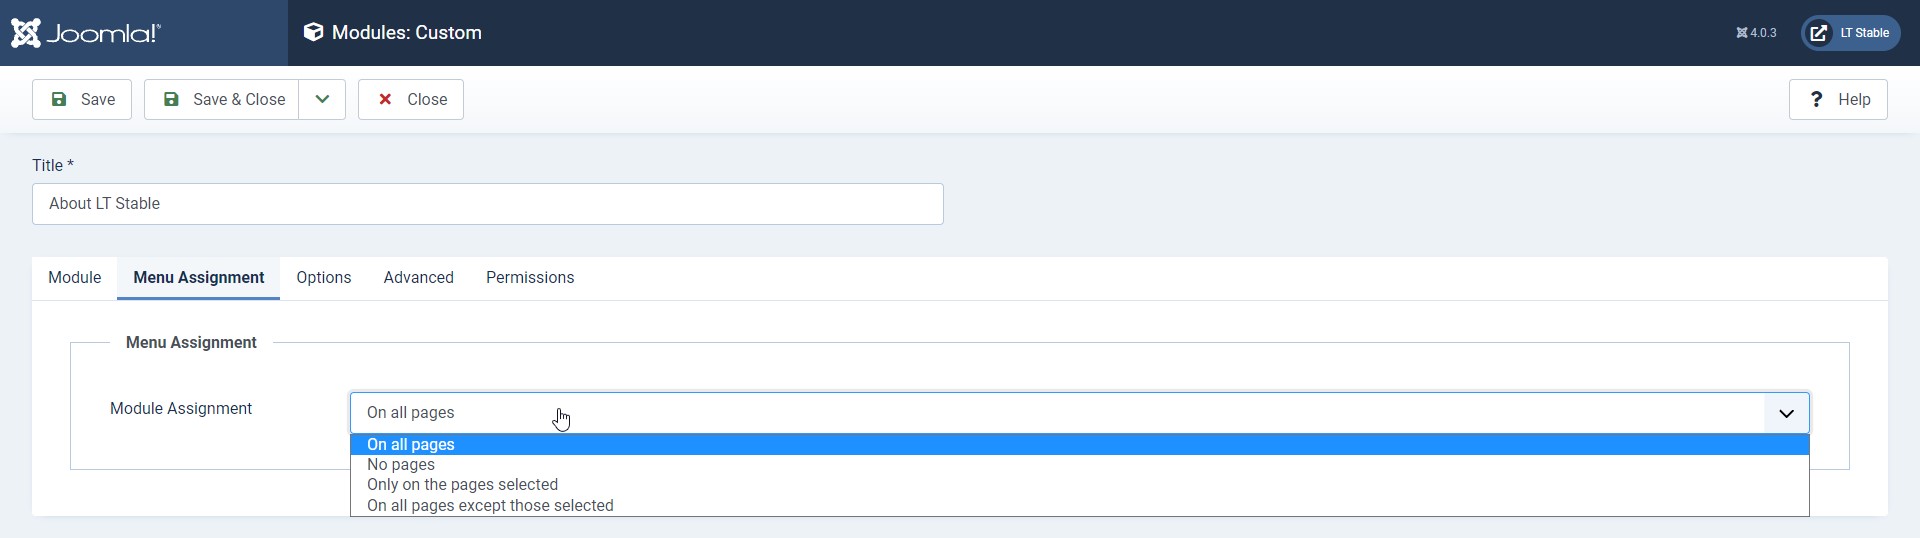
– All pages: Module will show on all pages in the selected module position.
– No pages: Module will not show on any pages in the selected module position.
– Only on pages selected. The module will show only on pages in the selected module position as selected by menu item type(title).
– On all pages except those selected: Module will show on all pages in the selected module position, except those selected by menu item type(title).
OPTIONS TAB
Additional Options, such as Basic and Advanced can be found on the specific Module Type Help screen. Please notice that installed Extensions may contain more parameters in Additional Options. Please refer to the specific Extension Module’s information provided by the Extension developer.
How to replace Map Address in Contact page
Yes, most of Joomla! Templates provide a Contact page with Google Map, you can replace it by following steps:
- Disable Editor via Admin > Global Configuration, find the option “Editor” and disable it.
- Go to Map.Google.com, fill in your address and get your business location, then embed the Iframe code and copy it.
- Go to Admin > Module Manager, find a module named Map, then you can replace Map iframe embed code with your new code.
- After finish, you can check your map display and re-enable Editor.
3CX Live Chat
We’re using 3CX Live Chat as FREE Live Chat for our product. This is strongly recommended for any business. You just set up and it’s ready to use, download 3CX FREE Live Chat via Joomla! extension directory.
In order to activate your live chat you need to sign up with 3CX StartUP to get your web portal and apps to answer live chats.
- Get your free 3CX Account.
- Follow the steps in the wizard.
- Take note of the 3CX Talk URL that you will be given during the live chat step.
- Read our Getting Started Guide.
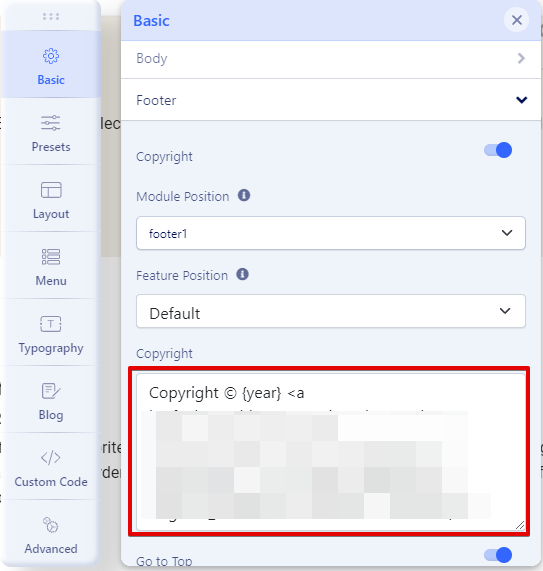
Remove / Replace Copyright
With the PRO version, you can remove the template copyright by Go to Joomla! Admin panel > System > Site Templates Style > [your-template]-default > Template Settings > Basic > Footer. From field “Copyright”, you can replace default copyright information to your copyright content. This field supports HTML code, so you can place HTML code such as link with ‘a’ tag or any tags you want, it’s flexible.